Sunday, 18 March 2018
Update #5
So the league has finally been started back up. Amant filled in for Danny's team, but only got a couple battles in before exams became a problem for him. So rather than let the league stay paused two more weeks, we will just have to let him catch up at a later date. Gotta move things along. Most people left off on their week 8 battles. So it might be a little while before I put out another report. In the meantime, I might try and make a few teams on Pokemon Showdown. I do have some free time now that I'm on vacation from work. Been meaning to try out the UU tier. I heard it was a lot of fun. Alright. See you around!

Friday, 2 March 2018
NBA Season 6 Week 7: Toronto Maple Leafeons
Hello again! Tommy aka AbruptFury, coach of the Toronto Maple Leafeons, here! We are just over halfway through the main season of the National Battling Assocation. And for the first time ever, I've hit the top of the leaderboard in a draft league. I'm so ecstatic! My team has been doing very well for me. Even Sylveon, who has been used mostly as a defensive pivot, has gotten itself 8 kills. I've been looking at a top cut calculator with the interest of seeing which coaches still have a chance, or how many matches I can afford to lose. Unfortunately, Sabastian of the San Jose Sharpedos has been eliminated from all contention with 6 loses. You can afford to lose 5 I believe, but it would come down to differential at that point. You could not afford to lose anymore than that. Assuming Sabastian doesn't make anymore transactions, there are some big threats that I won't have to deal with again. So that's pretty sweet.
This week, I face Ryan aka Gingerxpug. I've fought him before in this league. I ended up winning that encounter. He has some really weird threats that I don't have a whole lot of experience against in league, like Mega Pidgeot and Ditto. He has the great wall in Chansey too. Big offensive threats. It's an interesting team for sure. But I will do my best to keep my streak going and the wins coming.
My Team : Kyurem-B, Scizor, Sylveon, Vaporeon, Salazzle(Z), Zoroark, Electivire(Z), Dhelmise, Donphan, Mesprit(Z), Sawk
Gingerxpug (Mesa Magcargos): M-Pidgeot, Thundurus-I, Chansey, Golisopod(Z), Gardevoir(Z), Druddigon, Gourgeist, Infernape(Z), Ditto, Lanturn, Gengar
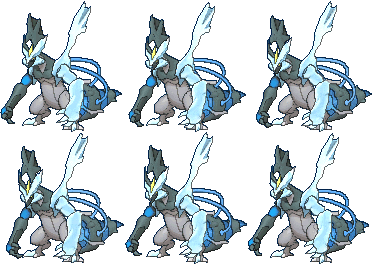 Bane (Kyurem-Black) @ Leftovers
Ability: Teravolt
EVs: 56 HP / 48 Atk / 164 SpA / 240 Spe
Rash Nature
- Ice Beam
- Fusion Bolt
- Earth Power
- Substitute
Kyurem-B proves to be a huge threat for my opponent. Ice Beam deals with such threats as Mega Pidgeot, Thundurus-I, Gourgeist, and Druddigon. Earth Power beats Infernape, Lanturn, and Gengar. Fusion Bolt does good damage to Golisopod, and hits Chansey about as hard as I can manage with Kyurem while being able to take down the main threats I'm looking to. Fun fact, Fusion Bolt combined with the Teravolt ability means that there is nothing that can absorb the hit. Ryan is lacking a Ground type on his team. Substitute will help with Kyurem's movepool and lack of speed so that it can just throw off hits. Leftovers gets Kyurem it's health back from Substitutes and perhaps hazards damage.
Offensive Calcs:
Defensive Calcs:
 ItzDaddy (Sawk) @ Choice Scarf
Ability: Sturdy
EVs: 40 HP / 252 Atk / 216 Spe
Jolly Nature
- Close Combat
- Stone Edge
- Knock Off
- Poison Jab
It's finally happening! The last Pokemon that I drafted originally, is coming to a battle. Close Combat does a massive amount of damage to Chansey, but can also help break Lanturn and Druddigon since I'm not running Earthquake or Ice Punch on it. Stone Edge is for Mega Pidgeot, Thundurus-I and Golisopod. Knock Off hits the Gourgeist and Gengar, as well as removes items from stuff like Eviolite Chansey and Choice Scarf Ditto. And Poison Jab is purely for the Gardevoir. It gets the KO most of the time on Gardevoir if Gardevoir switches in on Stealth Rock. The Choice Scarf helps Sawk get the edge on Pokemon like Mega Pidgeot, and Pokemon without a Choice Scarf like Gourgeist-Small, Infernape, Thundurus-I. However, I did make Sawk fast enough to outspeed the Gardevoir with a Choice Scarf.
Offensive Calcs:
 Dr Claw (Scizor) @ Silk Scarf
Ability: Technician
EVs: 168 HP / 216 Atk / 4 Def / 120 Spe
Adamant Nature
- Swords Dance
- Bullet Punch
- Bug Bite
- Quick Attack
Similar to the Natural Gift set I made for Scizor weeks prior, the intention of this one is to help check certain Pokemon that give this one some trouble. Infernape and Thundurus-I have an easy time resisting Scizor's dual STAB options. But with a +2 Technician boosted Quick Attack, they are threatened by a chance to OHKO. Bullet Punch deals with a Choice Scarf Gardevoir threat. And Bug Bite does a massive amount of damage to multiple Pokemon after a Swords Dance. All I have to do with this set is try my best to get chip on certain Pokemon with Stealth Rock or other attacks, and make sure Scizor does not take a Knock Off. That way, it keeps the damage output for Quick Attack to pick off the faster threats before they can cause me trouble. Infernape has access to set up moves in Nasty Plot and Swords Dance. And Thundurus-I threatens a double dance (2 boosting moves like Nasty Plot and Agility) and a Nasty Plot set. Bug Bite can also remove berries, which could be helpful.
Offensive Calcs:
Defensive Calcs:
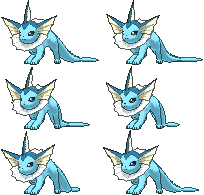 Ariel (Vaporeon) @ Leftovers
Ability: Water Absorb
EVs: 252 HP / 16 Def / 240 SpD
Calm Nature
IVs: 0 Atk
- Scald
- Wish
- Protect
- Heal Bell
I actually changed this set as I was writing the summary for Vaporeon. I took Nasty Plot Infernape into consideration. I can't let it get the free set up on me. Otherwise, it WILL sweep through my team. A Scald from Vaporeon will put Infernape into KO range for Quick Attack, or Bullet Punch even. Wish and Protect is pretty standard. I don't think I need to explain it. Heal Bell will be very useful against Chansey. It loves to paralyze and poison things with Thunder Wave and Toxic, respectively. This set takes a Fightinium Z Focus Bast and Grassium Z Grass Knot from Infernape. And it can even take a +2 Fightinium Z most of the time. Unfortunately, this means that I can't take on Choice Band and Life Orb Infernape quite as easily, but another Pokemon of mine can take a hit pretty well from it.
Offensive Calcs:
Defensive Calcs:
 Spark Plug (Electivire) @ Assault Vest
Ability: Motor Drive
EVs: 200 HP / 72 Atk / 236 Spe
Lonely Nature
- Discharge
- Ice Punch
- Cross Chop
- Earthquake
The set's main purpose is meant to dish out damage and take hits too. I know I find myself using the same sets a lot, but I think this one works well in a lot of circumstances due to the way my draft team is by default. It stops something like Thundurus-I and Mega Pidgeot from running train through me. And to be fair, something Thundurus is just so hard to prep for, that you might as well run Assault Vest Electric type until people start getting wise and slapping on Hidden Power Ground onto their special attacking Electric powerhouses. So Discharge is there to help me chip down Pokemon like Mega Pidgeot and Golisopod. And remember, I mentioned that the only thing that is immune to Electric on Ryan's team is Volt Absorb Lanturn. But that doesn't really do much back to Electivire. And I have Earthquake for that thing. Earthquake also hits Infernape and Gengar. Ice Punch is good against Gourgeist and Druddigon. And of course Cross Chop is for the Chansey. I hate that big pink blob. The reason I went for Lonely nature over Naive was because this is an Assault Vest. Didn't really want to take away from Electivire's bulk.
Offensive Calcs:
Defensive Calcs:
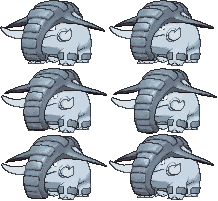 Dumbo (Donphan) @ Leftovers
Ability: Sturdy
EVs: 248 HP / 4 Atk / 40 Def / 72 SpD / 144 Spe
Impish Nature
- Stealth Rock
- Earthquake
- Ice Shard
- Rapid Spin
Here is my Stealth Rock setter and hazard removal for the match. I did not want to leave myself to open to a Thundurus sweep. It really is a tough Pokemon. Earthquake hits Lanturn, Gengar, and Infernape for some good damage. Even Gardevoir doesn't take it too well. Ice Shard can pick off a weakened foe, but it's main intent was to help take down the Thundurus before it destroys me with a Nasty Plot up. Just a big bulky tank, with some offensive presence. Nothing to see here...
Offensive Calcs:
Defensive Calcs:
This week, I face Ryan aka Gingerxpug. I've fought him before in this league. I ended up winning that encounter. He has some really weird threats that I don't have a whole lot of experience against in league, like Mega Pidgeot and Ditto. He has the great wall in Chansey too. Big offensive threats. It's an interesting team for sure. But I will do my best to keep my streak going and the wins coming.
The Team Line-ups
My Team : Kyurem-B, Scizor, Sylveon, Vaporeon, Salazzle(Z), Zoroark, Electivire(Z), Dhelmise, Donphan, Mesprit(Z), Sawk
Gingerxpug (Mesa Magcargos): M-Pidgeot, Thundurus-I, Chansey, Golisopod(Z), Gardevoir(Z), Druddigon, Gourgeist, Infernape(Z), Ditto, Lanturn, Gengar
The Game Plan
Ability: Teravolt
EVs: 56 HP / 48 Atk / 164 SpA / 240 Spe
Rash Nature
- Ice Beam
- Fusion Bolt
- Earth Power
- Substitute
Kyurem-B proves to be a huge threat for my opponent. Ice Beam deals with such threats as Mega Pidgeot, Thundurus-I, Gourgeist, and Druddigon. Earth Power beats Infernape, Lanturn, and Gengar. Fusion Bolt does good damage to Golisopod, and hits Chansey about as hard as I can manage with Kyurem while being able to take down the main threats I'm looking to. Fun fact, Fusion Bolt combined with the Teravolt ability means that there is nothing that can absorb the hit. Ryan is lacking a Ground type on his team. Substitute will help with Kyurem's movepool and lack of speed so that it can just throw off hits. Leftovers gets Kyurem it's health back from Substitutes and perhaps hazards damage.
Offensive Calcs:
- Outspeeds Timid max speed Gardevoir by 1 point.
- 164+ SpA Teravolt Kyurem-Black Earth Power vs. 0 HP / 72 SpD Lanturn: 218-258 (55.7 - 65.9%) -- guaranteed 2HKO
- 164+ SpA Teravolt Kyurem-Black Ice Beam vs. 0 HP / 4 SpD Pidgeot-Mega: 342-404 (111.4 - 131.5%) -- guaranteed OHKO
- 164+ SpA Teravolt Kyurem-Black Ice Beam vs. 0 HP / 4 SpD Thundurus: 342-404 (114.3 - 135.1%) -- guaranteed OHKO
- 48 Atk Teravolt Kyurem-Black Fusion Bolt vs. 252 HP / 172+ Def Golisopod: 132-156 (37.2 - 44%) -- 100% chance to 3HKO after Leftovers recovery
- 164+ SpA Teravolt Kyurem-Black Earth Power vs. 40 HP / 208+ SpD Lanturn: 170-202 (42.3 - 50.3%) -- guaranteed 3HKO after Leftovers recovery
- 164+ SpA Teravolt Kyurem-Black Ice Beam vs. 252 HP / 104 SpD Gourgeist-Large: 320-378 (90.3 - 106.7%) -- guaranteed OHKO after Stealth Rock and Leftovers recovery
- 164+ SpA Teravolt Kyurem-Black Ice Beam vs. 252 HP / 0 SpD Gourgeist: 362-428 (108.3 - 128.1%) -- guaranteed OHKO
- 48 Atk Teravolt Kyurem-Black Fusion Bolt vs. 0 HP / 4 Def Gardevoir: 167-197 (60.2 - 71.1%) -- guaranteed 2HKO
- 164+ SpA Teravolt Kyurem-Black Earth Power vs. 0 HP / 0- SpD Infernape: 282-332 (96.2 - 113.3%) -- 75% chance to OHKO
- 164+ SpA Teravolt Kyurem-Black Ice Beam vs. 252 HP / 4 SpD Druddigon: 312-368 (87.1 - 102.7%) -- 93.8% chance to OHKO after Stealth Rock
Defensive Calcs:
- Substitute doesn't break to a Chansey Seismic Toss.
- 252+ SpA Choice Specs Lanturn Volt Switch vs. 56 HP / 0 SpD Kyurem-Black: 72-85 (17.7 - 20.9%) -- possible 7HKO after Leftovers recovery
- 252 SpA Thundurus Focus Blast vs. 56 HP / 0- SpD Kyurem-Black: 310-366 (76.5 - 90.3%) -- guaranteed 2HKO after Leftovers recovery
- 252 SpA Gardevoir Moonblast vs. 56 HP / 0- SpD Kyurem-Black: 368-434 (90.8 - 107.1%) -- 43.8% chance to OHKO after Leftovers recovery
- 168 Atk Life Orb Infernape Mach Punch vs. 56 HP / 0 Def Kyurem-Black: 135-164 (33.3 - 40.4%) -- 32.5% chance to 3HKO after Leftovers recovery

Ability: Sturdy
EVs: 40 HP / 252 Atk / 216 Spe
Jolly Nature
- Close Combat
- Stone Edge
- Knock Off
- Poison Jab
It's finally happening! The last Pokemon that I drafted originally, is coming to a battle. Close Combat does a massive amount of damage to Chansey, but can also help break Lanturn and Druddigon since I'm not running Earthquake or Ice Punch on it. Stone Edge is for Mega Pidgeot, Thundurus-I and Golisopod. Knock Off hits the Gourgeist and Gengar, as well as removes items from stuff like Eviolite Chansey and Choice Scarf Ditto. And Poison Jab is purely for the Gardevoir. It gets the KO most of the time on Gardevoir if Gardevoir switches in on Stealth Rock. The Choice Scarf helps Sawk get the edge on Pokemon like Mega Pidgeot, and Pokemon without a Choice Scarf like Gourgeist-Small, Infernape, Thundurus-I. However, I did make Sawk fast enough to outspeed the Gardevoir with a Choice Scarf.
Offensive Calcs:
- Outspeeds Timid max speed Scarf Gardevoir.
- 252 Atk Sawk Poison Jab vs. 0 HP / 4 Def Gardevoir: 240-284 (86.6 - 102.5%) -- 93.8% chance to OHKO after Stealth Rock
- 252 Atk Sawk Stone Edge vs. 0 HP / 4 Def Pidgeot-Mega: 254-300 (82.7 - 97.7%) -- guaranteed OHKO after Stealth Rock
- 252 Atk Sawk Stone Edge vs. 0 HP / 4 Def Thundurus: 282-334 (94.3 - 111.7%) -- 68.8% chance to OHKO
- 252 Atk Sawk Knock Off (97.5 BP) vs. 4 HP / 0 Def Gengar: 312-368 (119 - 140.4%) -- guaranteed OHKO
- 252 Atk Sawk Close Combat vs. 248 HP / 252+ Def Eviolite Chansey: 506-596 (71.9 - 84.7%) -- guaranteed 2HKO
- 252 Atk Sawk Close Combat vs. 40 HP / 0 Def Sawk: 243-286 (80.7 - 95%) -- guaranteed 2HKO | For Ditto.
- 252 Atk Sawk Close Combat vs. 252 HP / 4 Def Lanturn: 294-346 (64.7 - 76.2%) -- guaranteed 2HKO after Leftovers recovery
- 252 Atk Sawk Stone Edge vs. 252 HP / 172+ Def Golisopod: 128-152 (36.1 - 42.9%) -- 96.4% chance to 3HKO after Leftovers recovery
- 252 Atk Sawk Knock Off (97.5 BP) vs. 252 HP / 4 Def Gourgeist: 174-206 (52 - 61.6%) -- guaranteed 2HKO
- 252 Atk Sawk Knock Off (97.5 BP) vs. 252 HP / 88+ Def Gourgeist-Large: 146-174 (41.2 - 49.1%) -- guaranteed 3HKO after Leftovers recovery

Ability: Technician
EVs: 168 HP / 216 Atk / 4 Def / 120 Spe
Adamant Nature
- Swords Dance
- Bullet Punch
- Bug Bite
- Quick Attack
Similar to the Natural Gift set I made for Scizor weeks prior, the intention of this one is to help check certain Pokemon that give this one some trouble. Infernape and Thundurus-I have an easy time resisting Scizor's dual STAB options. But with a +2 Technician boosted Quick Attack, they are threatened by a chance to OHKO. Bullet Punch deals with a Choice Scarf Gardevoir threat. And Bug Bite does a massive amount of damage to multiple Pokemon after a Swords Dance. All I have to do with this set is try my best to get chip on certain Pokemon with Stealth Rock or other attacks, and make sure Scizor does not take a Knock Off. That way, it keeps the damage output for Quick Attack to pick off the faster threats before they can cause me trouble. Infernape has access to set up moves in Nasty Plot and Swords Dance. And Thundurus-I threatens a double dance (2 boosting moves like Nasty Plot and Agility) and a Nasty Plot set. Bug Bite can also remove berries, which could be helpful.
Offensive Calcs:
- Outspeeds max speed Druddigon without boosting nature by 1 point.
- +2 216+ Atk Silk Scarf Technician Scizor Quick Attack vs. 0 HP / 4 Def Infernape: 222-262 (75.7 - 89.4%) -- 12.5% chance to OHKO after Stealth Rock
- 216+ Atk Technician Scizor Bullet Punch vs. 0 HP / 4 Def Gardevoir: 300-354 (108.3 - 127.7%) -- guaranteed OHKO
- +2 216+ Atk Silk Scarf Technician Scizor Quick Attack vs. 0 HP / 4 Def Thundurus: 225-265 (75.2 - 88.6%) -- guaranteed OHKO after Stealth Rock
- +2 216+ Atk Technician Scizor Bullet Punch vs. 0 HP / 4 Def Pidgeot-Mega: 252-297 (82 - 96.7%) -- guaranteed OHKO after Stealth Rock
- +2 216+ Atk Technician Scizor Bug Bite vs. 252 HP / 252+ Def Druddigon: 244-288 (68.1 - 80.4%) -- guaranteed 2HKO
- +2 216+ Atk Technician Scizor Bug Bite vs. 252 HP / 0+ Def Druddigon: 313-370 (87.4 - 103.3%) -- 93.8% chance to OHKO after Stealth Rock
- +2 216+ Atk Technician Scizor Bug Bite vs. 252 HP / 4 Def Lanturn: 486-573 (107 - 126.2%) -- guaranteed OHKO
- +2 216+ Atk Technician Scizor Bug Bite vs. 248 HP / 252+ Def Eviolite Chansey: 418-493 (59.4 - 70.1%) -- guaranteed 2HKO
- +2 216+ Atk Technician Scizor Bullet Punch vs. 4 HP / 0 Def Gengar: 318-375 (121.3 - 143.1%) -- guaranteed OHKO
Defensive Calcs:
- 4 Atk Mold Breaker Druddigon Fire Punch vs. 168 HP / 4 Def Scizor: 252-300 (78 - 92.8%) -- guaranteed 2HKO
- 0 SpA Chansey Flamethrower vs. 168 HP / 0 SpD Scizor: 140-168 (43.3 - 52%) -- 10.5% chance to 2HKO
Ability: Water Absorb
EVs: 252 HP / 16 Def / 240 SpD
Calm Nature
IVs: 0 Atk
- Scald
- Wish
- Protect
- Heal Bell
I actually changed this set as I was writing the summary for Vaporeon. I took Nasty Plot Infernape into consideration. I can't let it get the free set up on me. Otherwise, it WILL sweep through my team. A Scald from Vaporeon will put Infernape into KO range for Quick Attack, or Bullet Punch even. Wish and Protect is pretty standard. I don't think I need to explain it. Heal Bell will be very useful against Chansey. It loves to paralyze and poison things with Thunder Wave and Toxic, respectively. This set takes a Fightinium Z Focus Bast and Grassium Z Grass Knot from Infernape. And it can even take a +2 Fightinium Z most of the time. Unfortunately, this means that I can't take on Choice Band and Life Orb Infernape quite as easily, but another Pokemon of mine can take a hit pretty well from it.
Offensive Calcs:
- 4 SpA Vaporeon Scald vs. 0 HP / 0 SpD Infernape: 252-296 (86 - 101%) -- 87.5% chance to OHKO after Stealth Rock
- 4 SpA Vaporeon Scald vs. 0 HP / 4 SpD Thundurus: 112-133 (37.4 - 44.4%) -- guaranteed 3HKO
- 4 SpA Vaporeon Scald vs. 4 HP / 0 SpD Gengar: 118-141 (45 - 53.8%) -- guaranteed 2HKO after Stealth Rock
Defensive Calcs:
- 252 Atk Life Orb Infernape Close Combat vs. 252 HP / 16 Def Vaporeon: 321-380 (69.1 - 81.8%) -- guaranteed 2HKO after Leftovers recovery
- 252 SpA Life Orb Thundurus Thunderbolt vs. 252 HP / 240+ SpD Vaporeon: 283-335 (60.9 - 72.1%) -- guaranteed 2HKO after Leftovers recovery
- 252+ Atk Choice Band Golisopod Leech Life vs. 252 HP / 16 Def Vaporeon: 309-364 (66.5 - 78.4%) -- guaranteed 2HKO after Leftovers recovery
- 252 Atk Life Orb Sheer Force Druddigon Thunder Punch vs. 252 HP / 16 Def Vaporeon: 387-458 (83.4 - 98.7%) -- guaranteed 2HKO after Leftovers recovery
- 252 SpA Gardevoir Thunderbolt vs. 252 HP / 240+ SpD Vaporeon: 146-172 (31.4 - 37%) -- guaranteed 4HKO after Leftovers recovery
- 252 SpA Pidgeot-Mega Hurricane vs. 252 HP / 240+ SpD Vaporeon: 139-165 (29.9 - 35.5%) -- guaranteed 4HKO after Leftovers recovery
- 252 SpA Life Orb Gengar Sludge Wave vs. 252 HP / 240+ SpD Vaporeon: 153-181 (32.9 - 39%) -- 8.1% chance to 3HKO after Leftovers recovery
- 252 SpA Infernape Bloom Doom (160 BP) vs. 252 HP / 240+ SpD Vaporeon: 226-266 (48.7 - 57.3%) -- 44.9% chance to 2HKO after Leftovers recovery
- +2 252 SpA Infernape All-Out Pummeling (190 BP) vs. 252 HP / 240+ SpD Vaporeon: 399-471 (85.9 - 101.5%) -- 12.5% chance to OHKO after Leftovers recovery

Ability: Motor Drive
EVs: 200 HP / 72 Atk / 236 Spe
Lonely Nature
- Discharge
- Ice Punch
- Cross Chop
- Earthquake
The set's main purpose is meant to dish out damage and take hits too. I know I find myself using the same sets a lot, but I think this one works well in a lot of circumstances due to the way my draft team is by default. It stops something like Thundurus-I and Mega Pidgeot from running train through me. And to be fair, something Thundurus is just so hard to prep for, that you might as well run Assault Vest Electric type until people start getting wise and slapping on Hidden Power Ground onto their special attacking Electric powerhouses. So Discharge is there to help me chip down Pokemon like Mega Pidgeot and Golisopod. And remember, I mentioned that the only thing that is immune to Electric on Ryan's team is Volt Absorb Lanturn. But that doesn't really do much back to Electivire. And I have Earthquake for that thing. Earthquake also hits Infernape and Gengar. Ice Punch is good against Gourgeist and Druddigon. And of course Cross Chop is for the Chansey. I hate that big pink blob. The reason I went for Lonely nature over Naive was because this is an Assault Vest. Didn't really want to take away from Electivire's bulk.
Offensive Calcs:
- Outspeeds Timid max speed Gardevoir by 1 point.
- 72+ Atk Electivire Cross Chop vs. 248 HP / 252+ Def Eviolite Chansey: 266-314 (37.8 - 44.6%) -- guaranteed 3HKO
- 72+ Atk Electivire Earthquake vs. 0 HP / 4 Def Gardevoir: 141-167 (50.9 - 60.2%) -- guaranteed 2HKO
- 72+ Atk Electivire Earthquake vs. 252 HP / 4 Def Lanturn: 310-366 (68.2 - 80.6%) -- guaranteed 2HKO after Leftovers recovery
- 72+ Atk Electivire Ice Punch vs. 0 HP / 4 Def Pidgeot-Mega: 180-214 (58.6 - 69.7%) -- guaranteed 2HKO
- 72+ Atk Electivire Earthquake vs. 0 HP / 4 Def Infernape: 264-312 (90.1 - 106.4%) -- guaranteed OHKO after Stealth Rock
- 72+ Atk Electivire Earthquake vs. 4 HP / 0 Def Gengar: 304-358 (116 - 136.6%) -- guaranteed OHKO
- 0 SpA Electivire Discharge vs. 0 HP / 4 SpD Golisopod: 180-212 (61.8 - 72.8%) -- guaranteed 2HKO
- 72+ Atk Electivire Ice Punch vs. 0 HP / 4 Def Thundurus: 202-238 (67.5 - 79.5%) -- guaranteed 2HKO
- 72+ Atk Electivire Ice Punch vs. 252 HP / 252+ Def Druddigon: 116-138 (32.4 - 38.5%) -- guaranteed 3HKO after Stealth Rock
Defensive Calcs:
- 252 SpA Life Orb Thundurus Focus Blast vs. 200 HP / 0 SpD Assault Vest Electivire: 126-149 (36.9 - 43.6%) -- guaranteed 3HKO after Stealth Rock
- 252 Atk Choice Band Infernape Mach Punch vs. 200 HP / 0- Def Electivire: 130-154 (38.1 - 45.1%) -- guaranteed 3HKO
- 252+ Atk Choice Band Golisopod Leech Life vs. 200 HP / 0- Def Electivire: 322-381 (94.4 - 111.7%) -- 68.8% chance to OHKO | Can't take that. Good thing I have Vaporeon.
Ability: Sturdy
EVs: 248 HP / 4 Atk / 40 Def / 72 SpD / 144 Spe
Impish Nature
- Stealth Rock
- Earthquake
- Ice Shard
- Rapid Spin
Here is my Stealth Rock setter and hazard removal for the match. I did not want to leave myself to open to a Thundurus sweep. It really is a tough Pokemon. Earthquake hits Lanturn, Gengar, and Infernape for some good damage. Even Gardevoir doesn't take it too well. Ice Shard can pick off a weakened foe, but it's main intent was to help take down the Thundurus before it destroys me with a Nasty Plot up. Just a big bulky tank, with some offensive presence. Nothing to see here...
Offensive Calcs:
- Outspeeds 4 Speed EV Lanturn by 1 point.
- 4 Atk Donphan Earthquake vs. 4 HP / 0 Def Gengar: 384-452 (146.5 - 172.5%) -- guaranteed OHKO
- 4 Atk Donphan Ice Shard vs. 0 HP / 4 Def Pidgeot-Mega: 82-98 (26.7 - 31.9%) -- guaranteed 4HKO
- 4 Atk Donphan Ice Shard vs. 0 HP / 4 Def Thundurus: 90-108 (30.1 - 36.1%) -- 40% chance to 3HKO
- 4 Atk Donphan Ice Shard vs. 44 HP / 0 Def Gourgeist: 58-70 (20.5 - 24.8%) -- guaranteed 5HKO
- 4 Atk Donphan Earthquake vs. 0 HP / 4 Def Lanturn: 390-462 (99.7 - 118.1%) -- 93.8% chance to OHKO
- 4 Atk Donphan Earthquake vs. 252 HP / 4 Def Lanturn: 390-462 (85.9 - 101.7%) -- 87.5% chance to OHKO after Stealth Rock
Defensive Calcs:
- 252 SpA Life Orb Gengar Shadow Ball vs. 248 HP / 72 SpD Donphan: 231-273 (60.3 - 71.2%) -- guaranteed 2HKO after Leftovers recovery
- 252 Atk Life Orb Infernape Flare Blitz vs. 248 HP / 40+ Def Donphan: 165-195 (43 - 50.9%) -- guaranteed 3HKO after Leftovers recovery
- 252+ Atk Life Orb Druddigon Dragon Claw vs. 248 HP / 40+ Def Donphan: 133-157 (34.7 - 40.9%) -- 66.3% chance to 3HKO after Leftovers recovery
- 0 SpA Lanturn Scald vs. 248 HP / 72 SpD Donphan: 186-222 (48.5 - 57.9%) -- 54.3% chance to 2HKO after Leftovers recovery
The Aftermath
Here is the battle link: https://replay.pokemonshowdown.com/battlearea-gen7draftleague-39049
Week 7: Toronto Maple Leafeons (AbruptFury) vs. Mesa Magcargos (Gingerxpug)
Team that Ryan brought: M-Pidgeot, Ditto, Thundurus-I, Golisopod, Gardevoir, Druddigon
--------------------------------------------------------------------------------------------------------------------------
Match Summary and Explanations
- Since Kyurem-Black looked so good against Ryan, I decided to lead it. I figured he might go with Druddigon to set up his Stealth Rock; but instead, he sent out his Golisopod.
- I knew I could take any one hit and wanted to scout the set, since my switch-ins might get punished. I had also considered that he might just set up Spikes. I went for Substitute, as Golisopod lays into Kyurem with a powerful First Impression. I still have enough HP to get the Substitute up though, which is very good for me.
- Because his Golisopod hit so hard, I knew it had to be Choice Band. So I knew it couldn't attack again, since First Impression works similarly to Fake Out. I went for Ice Beam and hit the incoming Gardevoir with a critical hit.
- Gardevoir throws off a Moonblast and breaks my Substitute as Kyurem finishes it off with another Ice Beam. First blood goes to Kyurem-B. Pidgeot enters the battle.
- Since my Electivire has the Assault Vest, I know that it can tank anything from the Mega Pidgeot. So that's what I do, and I tank the Hurricane very well. However, Electivire is left with a confusion.
- I didn't want Electivire to beat itself down. I needed it to check the Thundurus-I. So I sent in my specially bulky Vaporeon to take another hit, but he switches into Druddigon.
- I knew that this would be the time that he would set up the Stealth Rock if he had it, so I switched my Pokemon yet again. This time, for Donphan. He does indeed set up his Stealth Rock.
- I went for my own Stealth Rock as he sent in Ditto.
- Ditto is able to remove my rocks since my Donphan also has the Rapid Spin, and I do the same to his.
- Since Ditto's PP for each move it copies when it Transforms is 5, I could easily stall him out of Rapid Spin and would inevitably get up my Stealth Rock. So that is what I do. But Ryan knows this as well, and brings back in the Golisopod.
- Ryan reads into my Vaporeon switch and goes for the Knock Off. It does a ton of damage. This is where I wish I had gone with a max defensive bulk Vaporeon again.
- A second hit from Golisopod is able to take down my Vaporeon, but not until after I go for Wish. I send out my Electivire to avenge it's fallen comrade.
- I went for Discharge as it was my way of hitting the Golisopod, but he switches into Druddigon to take the attack. Electivire is returned to max health.
- Ryan and I made the same sequence of plays where he sets up his rocks while I switch into Donphan, and Donphan sets up it's rocks as he switches to Ditto.
- This time, Ryan does not remove my rocks, but instead opts for his Mega Pidgeot, as I decided to switch into my Kyurem on what I was expecting to be the Rapid Spin. That way, I could get back some health through it's Leftovers as Ditto would be forced to switch while my side of the field was free of hazards.
- Made the safe play of going back into my Electivire on yet another Hurricane. This time, no confusion.
- Ryan switches out the Mega Pidgeot into Druddigon. I knew this was coming, so I went for Ice Punch and got some good damage off onto Druddigon. Unfortunately, Electivire took a good amount of chip from the combination of Rough Skin and Rocky Helmet.
- I didn't want to take anymore damage onto Electivire, so that I could still possibly bring it in on Thundurus. I switched out Electivire for Sawk knowing that it could take a hit, and easily get the KO back. Against anything really since it was a Choice Scarf set.
- I locked myself into Stone Edge feeling like that was the best move I could use against whatever he wanted to risk, but he just sacs the Druddigon. Sawk gets it's first kill of the season! Now, my entire team has at least one kill on every mon. I'm so proud! Ditto comes in and transforms into Sawk.
- I decided to go into Donphan to take the Close Combat or whatever else might KO my Sawk at the range it was at. It's a 3HKO.
- He expected the Earthquake and switches into Golisopod. But that's fine, I needed damage on it anyway. And it was indeed racking up thanks to the Stealth Rock.
- At this point, I pretty much knew I had to sac a mon. Kyurem-B, while having great coverage against his team, felt like the weakest link in my end game. So I sent it out and it actually survived the Choice Band Liquidation.
- I went for Fusion Bolt and caught the Thundurus-I with some big damage.
- Since Thundurus isn't a Z mon, Donphan didn't have much to fear when it came to being OHKO'd. I sent it out and it took a Dark Pulse decently well.
- Unless Ryan wanted to fodder it off later or try to remove the Stealth Rock with Ditto again, Thundurus would fall if it had to come in again. He just decides to let it go down to my Donphan's Ice Shard. Donphan nabs itself a kill. In comes Ditto. And this is actually what I was hoping for.
- At this point, everything is weakened and I wanted Ditto to face-off against my Donphan again. With good bulk on my Scizor, I knew it could take hits easily from my own 4 Attack EV Donphan. Yet another year that I trolled Ditto with my own team make-up.
- I send in my Scizor as Ditto locks itself into Rapid Spin.
- Free Swords Dance for me. Ryan brings in his Golisopod.
- He switches back into Ditto to try and take the Scizor on, but it's too late. Boosted Technician Bug Bite takes out the Ditto from half health. One kill for Scizor. Here comes Mega Pidgeot.
- Mega Pidgeot gets taken out of the sky by a Bullet Punch. Two kills for Scizor. Last mon standing is Golisopod.
- Scizor, being naturally faster than Golisopod, has no problem outspeeding and finishing it off with a Bug Bite. Scizor took out half of Ryan's team and won the game for the Toronto Maple Leafeons! We are now 6-1. We have won half of our regular season matches!
In Conclusion
Good game to you, Ryan. I know you weren't too confident about your chances going in since you kind of threw your team together last minute, but I think you still posed a threat. Like you said after the battle, First Impression or Knock Off would've taken out the Kyurem and made things a little easier on your Thundurus and/or other pokes. Or it would've closed the differential at least, which is definitely true. Figuring out that the Golisopod was Choice Band did help make the match easier, since I knew you had to switch after you used it. That thing certainly did some damage though, I must say. I thought without it's item, Vaporeon would survive the second hit. I did get a little bit shaken up after I lost my defensive backbone.
I'm so glad that my heat set put in some work! I didn't take out what I was hoping to with it, but I know it would've been able to have done the job. It just would've been really satisying watching an Infernape or Thundurus-I go down to a Scizor. Don't you agree? My Pokemon are all looking to be serving their purpose on the team, even if they haven't become that useful until this point. Or haven't stood out as much as the top mons on my team. I think they all have a job they can do. I can't see myself making many more changes leading up to playoffs. But it's hard to say when there are so many good mons on the market.
Hey! What About Week 8?
My opponent for the hype week that is week 8 unfortunately dropped due to personal issues with balancing school, life, and Pokemon. I can't really blame him for choosing the formers. I wish him luck in his future, and hope that he might join us for another season of draft league should his schedule start to open up more.
I decided to give the kills to Sylveon and Kyurem-Black, since they are two of my best offensive MVPs. sorry, Electivire
I will see you all for week 9, where I will be taking on Bruno. He is a fellow Canadian, and a one-time playoffs qualifier in the PFA/NBA in his debut season. The last time we battled, he ended up beating me. And he was the only game loss that the near-undefeated Orlando Magikarp took. So yeah, he's pretty good. I'm hoping that I can take a game off of him this time and cement myself at the top of the leaderboard going into the playoffs. Stay tuned.
Monday, 19 February 2018
Update #4
I won't be posting my week 7 report until next week. My league extended the deadline on matches. I just got mine out of the way quickly. But yea, a lot of the coaches were watching the Superbowl. And it kind of threw them off.
Thought I would keep my blog updated and anyone wondering informed. Your regularly scheduled league reports will be back soon!
Thought I would keep my blog updated and anyone wondering informed. Your regularly scheduled league reports will be back soon!
Monday, 12 February 2018
NBA Season 6 Week 6: Toronto Maple Leafeons
Tommy, here! aka AbruptFury. Coach of the Toronto Maple Leafeons! It's that time again. I'm here to bring you the results of my week 6 battle. This week, I battled Connor. A newcomer who is doing well in our league. Really well. He is the only undefeated player left as of week 5. Will we be able to defeat him? Or find out why no one else could?
My Team : Kyurem-B, Scizor, Sylveon, Vaporeon, Salazzle(Z), Zoroark, Electivire(Z), Dhelmise, Donphan, Mesprit(Z), Sawk
Connor (Miami Mimikyus): M-Alakazam, Salamence, Rotom-W(Z), Mudsdale, Decidueye(Z), Aromatisse, Tauros, Raikou, Conkeldurr(Z), Escavalier, Charizard
Bane (Kyurem-Black) @ Leftovers
Ability: Teravolt
EVs: 40 HP / 12 Def / 252 SpA / 4 SpD / 188 Spe
Timid Nature
IVs: 0 Atk
- Ice Beam
- Earth Power
- Flash Cannon
- Substitute
Kyurem-Black once again has a great matchup. Ice Beam can hit Salamence, Mudsdale, and Decidueye. Earth Power hits Rotom-Wash, Raikou, and Escavalier without an Assault Vest. Flash Cannon is there for the Aromatisse. I considered running Iron Head over Flash Cannon, but Aromatisse tend to be used physically defensively. And Iron Head actually did less damage to Assault Vest Conkeldurr than Ice Beam. Substitute could be nice to set up on something like Rotom-Wash. It couldn't break it with Volt Switch, so it couldn't really dance around my Kyurem-B too easy. Substitute can also take the RNG out of Pokemon somewhat. Taking a crit for me or making me immune to status moves as long as my opponent doesn't have Infiltrator. Which he doesn't.
Offensive Calcs:

The Team Line-ups
My Team : Kyurem-B, Scizor, Sylveon, Vaporeon, Salazzle(Z), Zoroark, Electivire(Z), Dhelmise, Donphan, Mesprit(Z), Sawk
Connor (Miami Mimikyus): M-Alakazam, Salamence, Rotom-W(Z), Mudsdale, Decidueye(Z), Aromatisse, Tauros, Raikou, Conkeldurr(Z), Escavalier, Charizard
The Game Plan
Ability: Teravolt
EVs: 40 HP / 12 Def / 252 SpA / 4 SpD / 188 Spe
Timid Nature
IVs: 0 Atk
- Ice Beam
- Earth Power
- Flash Cannon
- Substitute
Kyurem-Black once again has a great matchup. Ice Beam can hit Salamence, Mudsdale, and Decidueye. Earth Power hits Rotom-Wash, Raikou, and Escavalier without an Assault Vest. Flash Cannon is there for the Aromatisse. I considered running Iron Head over Flash Cannon, but Aromatisse tend to be used physically defensively. And Iron Head actually did less damage to Assault Vest Conkeldurr than Ice Beam. Substitute could be nice to set up on something like Rotom-Wash. It couldn't break it with Volt Switch, so it couldn't really dance around my Kyurem-B too easy. Substitute can also take the RNG out of Pokemon somewhat. Taking a crit for me or making me immune to status moves as long as my opponent doesn't have Infiltrator. Which he doesn't.
Offensive Calcs:
- Outspeeds Adamant max speed Salamence by 1 point. Outspeeds non-Scarf max speed Rotom-W.
- 252 SpA Teravolt Kyurem-Black Earth Power vs. 248 HP / 0 SpD Rotom-Wash: 176-208 (58 - 68.6%) -- guaranteed 2HKO after Leftovers recovery
- 252 SpA Teravolt Kyurem-Black Ice Beam vs. 0 HP / 4 SpD Yache Berry Salamence: 336-396 (101.5 - 119.6%) -- guaranteed OHKO | No hope for you.
- 252 SpA Teravolt Kyurem-Black Ice Beam vs. 0 HP / 0 SpD Alakazam-Mega: 135-159 (53.7 - 63.3%) -- guaranteed 2HKO |
- Both Ice Beam and Iron Head do the same amount; just gotta watch out for Intimidate and burn.
- 252 SpA Teravolt Kyurem-Black Ice Beam vs. 252 HP / 4 SpD Assault Vest Mudsdale: 212-252 (52.4 - 62.3%) -- guaranteed 2HKO
- 252 SpA Teravolt Kyurem-Black Ice Beam vs. 0 HP / 4 SpD Decidueye: 278-330 (93.6 - 111.1%) -- 62.5% chance to OHKO
- 252 SpA Teravolt Kyurem-Black Earth Power vs. 0 HP / 4 SpD Raikou: 186-220 (57.9 - 68.5%) -- guaranteed 2HKO after Leftovers recovery
- 252 SpA Teravolt Kyurem-Black Flash Cannon vs. 252 HP / 4 SpD Aromatisse: 180-214 (44.3 - 52.7%) -- guaranteed 3HKO after Leftovers recovery
- 252 SpA Teravolt Kyurem-Black Ice Beam vs. 0 HP / 92 SpD Assault Vest Conkeldurr: 117-138 (33.3 - 39.3%) -- guaranteed 3HKO
Defensive Calcs:
- 252 Atk Salamence Supersonic Skystrike (175 BP) vs. 40 HP / 12 Def Kyurem-Black: 289-342 (72 - 85.2%) -- guaranteed 2HKO after Leftovers recovery
- 252+ SpA Choice Specs Rotom-Wash Volt Switch vs. 40 HP / 4 SpD Kyurem-Black: 88-104 (21.9 - 25.9%) -- possible 5HKO after Leftovers recovery
- 252+ Atk Choice Band Escavalier Megahorn vs. 40 HP / 12 Def Kyurem-Black: 328-387 (81.7 - 96.5%) -- guaranteed 2HKO after Leftovers recovery

Trickywi (Sylveon) @ Leftovers
Ability: Pixilate
EVs: 252 HP / 252 Def / 4 SpA
Bold Nature
IVs: 0 Atk
- Hyper Voice
- Wish
- Protect
- Hidden Power [Fire]
Sylveon can bully his team with it's Fairy STAB. The only two Pokemon that are alright with taking it are Escavalier and Charizard. Hyper Voice will blow back anything else. Conkeldurr and Salamence, in particular, get decimated. Wish and Protect help with recovery, team support, and scouting. Hidden Power Fire helps me break the Escavalier since I can definitely see it coming.
Offensive Calcs:
Defensive Calcs:

Ability: Pixilate
EVs: 252 HP / 252 Def / 4 SpA
Bold Nature
IVs: 0 Atk
- Hyper Voice
- Wish
- Protect
- Hidden Power [Fire]
Sylveon can bully his team with it's Fairy STAB. The only two Pokemon that are alright with taking it are Escavalier and Charizard. Hyper Voice will blow back anything else. Conkeldurr and Salamence, in particular, get decimated. Wish and Protect help with recovery, team support, and scouting. Hidden Power Fire helps me break the Escavalier since I can definitely see it coming.
Offensive Calcs:
- 4 SpA Sylveon Hidden Power Fire vs. 252 HP / 4 SpD Escavalier: 180-216 (52.3 - 62.7%) -- guaranteed 2HKO
- 4 SpA Pixilate Sylveon Hyper Voice vs. 0 HP / 4 SpD Alakazam-Mega: 121-144 (48.2 - 57.3%) -- 91.8% chance to 2HKO
- 4 SpA Pixilate Sylveon Hyper Voice vs. 0 HP / 92 SpD Conkeldurr: 318-374 (90.5 - 106.5%) -- 37.5% chance to OHKO after burn damage
- 4 SpA Pixilate Sylveon Hyper Voice vs. 252 HP / 4 SpD Assault Vest Conkeldurr: 240-284 (57.9 - 68.5%) -- guaranteed 2HKO
- 4 SpA Pixilate Sylveon Hyper Voice vs. 0 HP / 4 SpD Salamence: 306-360 (92.4 - 108.7%) -- 50% chance to OHKO
- 4 SpA Pixilate Sylveon Hyper Voice vs. 248 HP / 0 SpD Rotom-Wash: 120-142 (39.6 - 46.8%) -- guaranteed 3HKO after Leftovers recovery
Defensive Calcs:
- 252 SpA Alakazam-Mega Psychic vs. 252 HP / 0 SpD Sylveon: 147-174 (37.3 - 44.1%) -- 100% chance to 3HKO after Leftovers recovery
- 252+ Atk Guts Conkeldurr Poison Jab vs. 252 HP / 252+ Def Sylveon: 286-338 (72.5 - 85.7%) -- guaranteed 2HKO after Leftovers recovery
- 252+ Atk Conkeldurr Poison Jab vs. 252 HP / 252+ Def Sylveon: 192-226 (48.7 - 57.3%) -- 47.7% chance to 2HKO after Leftovers recovery
- +1 252 Atk Salamence Earthquake vs. 252 HP / 252+ Def Sylveon: 158-187 (40.1 - 47.4%) -- guaranteed 3HKO after Leftovers recovery
- 252+ Atk Mudsdale Heavy Slam (120 BP) vs. 252 HP / 252+ Def Sylveon: 262-310 (66.4 - 78.6%) -- guaranteed 2HKO after Leftovers recovery
- 0 SpA Rotom-Wash Hydro Pump vs. 252 HP / 0 SpD Sylveon: 99-117 (25.1 - 29.6%) -- 0% chance to 4HKO after Leftovers recovery
- 252+ Atk Choice Band Escavalier Megahorn vs. 252 HP / 252+ Def Sylveon: 156-183 (39.5 - 46.4%) -- guaranteed 3HKO after Leftovers recovery

Lisa Simpson (Salazzle) @ Normalium Z
Ability: Corrosion
EVs: 16 HP / 4 Def / 252 SpA / 236 Spe
Modest Nature
IVs: 0 Atk
- Flamethrower
- Sludge Wave
- Encore
- Nasty Plot
Here's an interesting set. At first glance, it might look like a really standard Salazzle set. Okay - it's pretty standard. But it has a trick to it. My goal for setting up with Salazzle was to weaken certain mons and get an Encore off when Aromatisse came in. Maybe even Decidueye. With Z Encore, I get to use Encore and get a +1 in speed. This speed boost allows Salazzle to outspeed Mega Alakazam. I even EV'd Salazzle to be faster than Rotom-Wash, which is a common Choice Scarf user. After my target is locked into a move with Encore, I can get off a Nasty Plot boost. With +1 speed and +2 Special Attack, I should have no problem running through Connor's team. Flamethrower hits Pokemon Decidueye and Escavalier really hard. Sludge Wave hits the Aromatisse. If these attacks are boosted by Nasty Plot, they can easily grab some OHKOs.
Offensive Calcs:

Ability: Corrosion
EVs: 16 HP / 4 Def / 252 SpA / 236 Spe
Modest Nature
IVs: 0 Atk
- Flamethrower
- Sludge Wave
- Encore
- Nasty Plot
Here's an interesting set. At first glance, it might look like a really standard Salazzle set. Okay - it's pretty standard. But it has a trick to it. My goal for setting up with Salazzle was to weaken certain mons and get an Encore off when Aromatisse came in. Maybe even Decidueye. With Z Encore, I get to use Encore and get a +1 in speed. This speed boost allows Salazzle to outspeed Mega Alakazam. I even EV'd Salazzle to be faster than Rotom-Wash, which is a common Choice Scarf user. After my target is locked into a move with Encore, I can get off a Nasty Plot boost. With +1 speed and +2 Special Attack, I should have no problem running through Connor's team. Flamethrower hits Pokemon Decidueye and Escavalier really hard. Sludge Wave hits the Aromatisse. If these attacks are boosted by Nasty Plot, they can easily grab some OHKOs.
Offensive Calcs:
- Outspeeds max speed Salamence by 1 point.
- +2 252+ SpA Salazzle Sludge Wave vs. 248 HP / 0 SpD Rotom-Wash: 288-340 (95 - 112.2%) -- 75% chance to OHKO after Leftovers recovery
- +2 252+ SpA Salazzle Sludge Wave vs. 0 HP / 4 SpD Alakazam-Mega: 292-345 (116.3 - 137.4%) -- guaranteed OHKO
- +2 252+ SpA Salazzle Sludge Wave vs. 0 HP / 92 SpD Conkeldurr: 382-450 (108.8 - 128.2%) -- guaranteed OHKO
- +2 252+ SpA Salazzle Sludge Wave vs. 0 HP / 92 SpD Assault Vest Conkeldurr: 255-301 (72.6 - 85.7%) -- guaranteed 2HKO
- +2 252+ SpA Salazzle Sludge Wave vs. 0 HP / 4 SpD Salamence: 364-430 (109.9 - 129.9%) -- guaranteed OHKO
- +2 252+ SpA Salazzle Fire Blast vs. 252 HP / 4 SpD Assault Vest Mudsdale: 270-318 (66.8 - 78.7%) -- guaranteed 2HKO
- +2 252+ SpA Salazzle Fire Blast vs. 252 HP / 4 SpD Mudsdale: 403-475 (99.7 - 117.5%) -- 93.8% chance to OHKO
- +2 252+ SpA Salazzle Sludge Wave vs. 0 HP / 4 SpD Decidueye: 304-358 (102.3 - 120.5%) -- guaranteed OHKO | Don't have to risk the Fire Blast miss.
- +2 252+ SpA Salazzle Sludge Wave vs. 252 HP / 4 SpD Assault Vest Raikou: 204-240 (53.1 - 62.5%) -- guaranteed 2HKO
- +2 252+ SpA Salazzle Fire Blast vs. 252 HP / 4 SpD Assault Vest Raikou: 235-277 (61.1 - 72.1%) -- guaranteed 2HKO
Defensive Calcs:
- 252 Atk Decidueye Sucker Punch vs. 16 HP / 4 Def Salazzle: 101-119 (35.9 - 42.3%) -- guaranteed 3HKO
- 252+ Atk Guts Conkeldurr Mach Punch vs. 16 HP / 4 Def Salazzle: 85-101 (30.2 - 35.9%) -- 40.5% chance to 3HKO

SubToReedIRL (Zoroark) @ Choice Scarf
Ability: Illusion
EVs: 40 HP / 252 Atk / 216 Spe
Jolly Nature
- U-turn
- Knock Off
- Aerial Ace
- Sucker Punch
Zoroark helps me out with my speed game. Being already so fast, a Choice Scarf can help it outspeed other Choice Scarfers and Mega Alakazam. Zoroark is my best of dealing with Mega Alakazam by revenge killing it. U-turn helps me pivot around and can get some massive chip on Mega Alakazam without having to risk it switching, getting up a Substitute, or knocking Zoroark out because my opponent decided to run some bulk on his Mega Alakazam. The momentum provided by U-turn helps out Zoroark a lot with it's lacking damage output in this matchup and it's shallow moveset. Knock Off helps me get rid of Assault Vests and Choice Scarfs for Salazzle. Aerial Ace hits the Conkeldurr really well, while still being able to hit Decidueye. And Sucker Punch is mostly for revenge killing something like Salamence, which could get a couple of Dragon Dance boosts and outspeed this Choice Scarf user.
Offensive Calcs:
Ability: Illusion
EVs: 40 HP / 252 Atk / 216 Spe
Jolly Nature
- U-turn
- Knock Off
- Aerial Ace
- Sucker Punch
Zoroark helps me out with my speed game. Being already so fast, a Choice Scarf can help it outspeed other Choice Scarfers and Mega Alakazam. Zoroark is my best of dealing with Mega Alakazam by revenge killing it. U-turn helps me pivot around and can get some massive chip on Mega Alakazam without having to risk it switching, getting up a Substitute, or knocking Zoroark out because my opponent decided to run some bulk on his Mega Alakazam. The momentum provided by U-turn helps out Zoroark a lot with it's lacking damage output in this matchup and it's shallow moveset. Knock Off helps me get rid of Assault Vests and Choice Scarfs for Salazzle. Aerial Ace hits the Conkeldurr really well, while still being able to hit Decidueye. And Sucker Punch is mostly for revenge killing something like Salamence, which could get a couple of Dragon Dance boosts and outspeed this Choice Scarf user.
Offensive Calcs:
- Outspeeds Salamence with a Dragon Dance boost or with a Scarf by 1 point.
- 252 Atk Zoroark Aerial Ace vs. 0 HP / 4 Def Conkeldurr: 118-140 (33.6 - 39.8%) -- guaranteed 3HKO
- 252 Atk Zoroark U-turn vs. 0 HP / 4 Def Alakazam-Mega: 186-220 (74.1 - 87.6%) -- guaranteed 2HKO
- 252 Atk Zoroark Knock Off (97.5 BP) vs. 0 HP / 4 Def Alakazam-Mega: 386-456 (153.7 - 181.6%) -- guaranteed OHKO
- 252 Atk Zoroark Knock Off (97.5 BP) vs. 0 HP / 4 Def Raikou: 172-204 (53.5 - 63.5%) -- guaranteed 2HKO
- 252 Atk Decidueye Sinister Arrow Raid vs. 40 HP / 0 Def Zoroark: 194-228 (71.5 - 84.1%) -- guaranteed 2HKO
- 252 Atk Zoroark Knock Off (97.5 BP) vs. 0 HP / 4 Def Tauros: 142-168 (48.7 - 57.7%) -- 94.9% chance to 2HKO
- 252 Atk Zoroark Knock Off (97.5 BP) vs. 0 HP / 4 Def Salamence: 163-193 (49.2 - 58.3%) -- 98.4% chance to 2HKO
Defensive Calcs:
- 252+ Atk Conkeldurr Mach Punch vs. 40 HP / 0 Def Zoroark: 230-272 (84.8 - 100.3%) -- 6.3% chance to OHKO
- 252 SpA Alakazam-Mega Shadow Ball vs. 40 HP / 0 SpD Zoroark: 82-97 (30.2 - 35.7%) -- 40.7% chance to 3HKO
Spark Plug (Electivire) @ Life Orb
Ability: Motor Drive
EVs: 40 HP / 200 Atk / 80 SpA / 188 Spe
Naive Nature
- Wild Charge
- Hidden Power [Ice]
- Earthquake
- Toxic
A nice mixed set for my Electivire, with the goal of breaking down Connor's team. Wild Charge is a nice STAB option that allows me to get some good damage off on anything that is hit for neutral, and Charizard. Hidden Power Ice is mainly for the Salamence, but could also wear down Decidueye and Mudsdale. Earthquake hits Raikou. And Toxic hurts his bulky threats a lot. Despite having status-absorbers in Mega Alakazam pre-mega and Guts Conkeldurr (not to mention cleric support in his Aromatisse), I still felt like Toxic was important against certain Pokemon. It helps break down bulky Rotom-Wash and Mudsdale. Mudsdale can potentially take 4 Hidden Power Ices with Assault Vest. Absorbing an Electric type attack from Rotom-Wash or Raikou would also cause Electivire to become faster than Connor's team, even the most relevant Choice Scarf users.
Offensive Calcs:
Defensive Calcs:

Ability: Motor Drive
EVs: 40 HP / 200 Atk / 80 SpA / 188 Spe
Naive Nature
- Wild Charge
- Hidden Power [Ice]
- Earthquake
- Toxic
A nice mixed set for my Electivire, with the goal of breaking down Connor's team. Wild Charge is a nice STAB option that allows me to get some good damage off on anything that is hit for neutral, and Charizard. Hidden Power Ice is mainly for the Salamence, but could also wear down Decidueye and Mudsdale. Earthquake hits Raikou. And Toxic hurts his bulky threats a lot. Despite having status-absorbers in Mega Alakazam pre-mega and Guts Conkeldurr (not to mention cleric support in his Aromatisse), I still felt like Toxic was important against certain Pokemon. It helps break down bulky Rotom-Wash and Mudsdale. Mudsdale can potentially take 4 Hidden Power Ices with Assault Vest. Absorbing an Electric type attack from Rotom-Wash or Raikou would also cause Electivire to become faster than Connor's team, even the most relevant Choice Scarf users.
Offensive Calcs:
- Outspeeds relevant Scarf users and Mega Alakazam with a Motor Drive boost.
- 200 Atk Life Orb Electivire Wild Charge vs. 0 HP / 4 Def Alakazam-Mega: 251-296 (100 - 117.9%) -- guaranteed OHKO
- 80 SpA Life Orb Electivire Hidden Power Ice vs. 0 HP / 4 SpD Salamence: 281-333 (84.8 - 100.6%) -- 6.3% chance to OHKO
- 200 Atk Life Orb Electivire Wild Charge vs. 0 HP / 4 Def Rotom-Wash: 165-196 (68.4 - 81.3%) -- guaranteed 2HKO after Leftovers recovery
- 200 Atk Life Orb Electivire Wild Charge vs. 248 HP / 200+ Def Rotom-Wash: 129-152 (42.5 - 50.1%) -- guaranteed 3HKO after Leftovers recovery
- 200 Atk Life Orb Electivire Wild Charge vs. 0 HP / 4 Def Conkeldurr: 185-218 (52.7 - 62.1%) -- guaranteed 2HKO after
- burn damage
- 80 SpA Life Orb Electivire Hidden Power Ice vs. 252 HP / 4 SpD Mudsdale: 133-159 (32.9 - 39.3%) -- 99.8% chance to 3HKO
- 200 Atk Life Orb Electivire Earthquake vs. 0 HP / 4 Def Raikou: 333-393 (103.7 - 122.4%) -- guaranteed OHKO
- 200 Atk Life Orb Electivire Earthquake vs. 252 HP / 0 Def Raikou: 333-393 (86.7 - 102.3%) -- 12.5% chance to OHKO
- after Leftovers recovery
- 200 Atk Life Orb Electivire Wild Charge vs. 252 HP / 0 Def Escavalier: 172-203 (50 - 59%) -- guaranteed 2HKO
- 200 Atk Life Orb Electivire Wild Charge vs. 0 HP / 4 Def Charizard: 437-515 (147.1 - 173.4%) -- guaranteed OHKO
Defensive Calcs:
- 0 SpA Rotom-Wash Hydro Pump vs. 40 HP / 0- SpD Electivire: 157-186 (52.1 - 61.7%) -- guaranteed 2HKO
- 252 SpA Life Orb Raikou Shadow Ball vs. 40 HP / 0- SpD Electivire: 133-157 (44.1 - 52.1%) -- 16% chance to 2HKO
Dumbo (Donphan) @ Assault Vest
Ability: Sturdy
Shiny: Yes
EVs: 248 HP / 8 Atk / 156 Def / 96 SpD
Impish Nature
- Ice Shard
- Earthquake
- Knock Off
- Rapid Spin
Donphan's main job is to keep hazards off the field and potentially take out the Salamence. It can also help Salazzle by removing items on Connor's team. It also hurts Decidueye and Mega Alakazam. Ice Shard does a lot to Salamence, especially if it doesn't Intimidate Donphan. Earthquake hits for good damage against weaker or weakened foes that are grounded. And Rapid Spin removes opposing hazards like Stealth Rock. Assault Vest can allow this Pokemon to take a hit from the likes of Rotom-Wash, Raikou, and Mega Alakazam, and strike back with Earthquake or Knock Off.
Offensive Calcs:
Defensive Calcs:
Here is the battle link: https://replay.pokemonshowdown.com/battlearea-gen7draftleague-33433
Week 6: Toronto Maple Leafeons (AbruptFury) vs. Miami Mimikyus (NohrPrinceXander)
Team that Connor brought: M-Alakazam, Conkeldurr, Rotom-Wash, Mudsdale, Escavalier, Salamence
--------------------------------------------------------------------------------------------------------------------------
Ability: Sturdy
Shiny: Yes
EVs: 248 HP / 8 Atk / 156 Def / 96 SpD
Impish Nature
- Ice Shard
- Earthquake
- Knock Off
- Rapid Spin
Donphan's main job is to keep hazards off the field and potentially take out the Salamence. It can also help Salazzle by removing items on Connor's team. It also hurts Decidueye and Mega Alakazam. Ice Shard does a lot to Salamence, especially if it doesn't Intimidate Donphan. Earthquake hits for good damage against weaker or weakened foes that are grounded. And Rapid Spin removes opposing hazards like Stealth Rock. Assault Vest can allow this Pokemon to take a hit from the likes of Rotom-Wash, Raikou, and Mega Alakazam, and strike back with Earthquake or Knock Off.
Offensive Calcs:
- 8 Atk Donphan Ice Shard vs. 0 HP / 4 Def Salamence: 164-196 (49.5 - 59.2%) -- 99.6% chance to 2HKO
- 8 Atk Donphan Knock Off (97.5 BP) vs. 0 HP / 4 Def Alakazam-Mega: 232-274 (92.4 - 109.1%) -- 56.3% chance to OHKO | At that point, I could pick it off with Ice Shard.
- 8 Atk Donphan Knock Off vs. 0 HP / 4 Def Decidueye: 140-166 (47.1 - 55.8%) -- 76.6% chance to 2HKO
- 8 Atk Donphan Earthquake vs. 0 HP / 0 Def Raikou: 320-380 (99.6 - 118.3%) -- 93.8% chance to OHKO
- 8 Atk Donphan Earthquake vs. 172 HP / 0 Def Escavalier: 121-144 (37.3 - 44.4%) -- guaranteed 3HKO
Defensive Calcs:
- 252 SpA Alakazam-Mega Psychic vs. 248 HP / 96 SpD Assault Vest Donphan: 160-190 (41.7 - 49.6%) -- guaranteed 3HKO
- 252+ SpA Rotom-Wash Hydro Pump vs. 248 HP / 96 SpD Assault Vest Donphan: 300-354 (78.3 - 92.4%) -- guaranteed 2HKO
- 252 SpA Alakazam-Mega Energy Ball vs. 248 HP / 96 SpD Assault Vest Donphan: 214-254 (55.8 - 66.3%) -- guaranteed 2HKO
- 252 Atk Decidueye Leaf Blade vs. 248 HP / 252+ Def Donphan: 164-194 (42.8 - 50.6%) -- 1.6% chance to 2HKO
- 4 SpA Life Orb Sheer Force Tauros Ice Beam vs. 248 HP / 96 SpD Assault Vest Donphan: 96-114 (25 - 29.7%) -- guaranteed 4HKO
- 252 SpA Choice Specs Raikou Hidden Power Ice vs. 248 HP / 96 SpD Assault Vest Donphan: 158-188 (41.2 - 49%) -- guaranteed 3HKO
- 252 SpA Raikou Hidden Power Ice vs. 248 HP / 96 SpD Assault Vest Donphan: 106-126 (27.6 - 32.8%) -- guaranteed 4HKO
- 252 Atk Salamence Dragon Claw vs. 248 HP / 252+ Def Donphan: 85-102 (22.1 - 26.6%) -- 17.1% chance to 4HKO
- 252+ Atk Choice Band Escavalier Megahorn vs. 248 HP / 252+ Def Donphan: 211-249 (55 - 65%) -- guaranteed 2HKO
- 252+ Atk Escavalier Megahorn vs. 248 HP / 252+ Def Donphan: 141-166 (36.8 - 43.3%) -- guaranteed 3HKO
The Aftermath
Here is the battle link: https://replay.pokemonshowdown.com/battlearea-gen7draftleague-33433
Week 6: Toronto Maple Leafeons (AbruptFury) vs. Miami Mimikyus (NohrPrinceXander)
Team that Connor brought: M-Alakazam, Conkeldurr, Rotom-Wash, Mudsdale, Escavalier, Salamence
--------------------------------------------------------------------------------------------------------------------------
Match Summary and Explanations
- So I'm pretty sure he's gonna lead Mudsdale to get up the Stealth Rock. Usually people run that. Although, I went without it this week just so I could opt for other things. However, I didn't know how bulky this Mudsdale was. Maybe it was actually Assault Vest. So I felt it was in my best interest to lead Donphan and stop his Stealth Rock or knock an item off. He does in fact lead the Mudsdale.
- He goes for Toxic as I go for the Knock Off. Mudsdale parts ways with it's Leftovers. Since Connor didn't bring Aromatisse, that pretty much meant no more recovery.
- I didn't want to stay in with Donphan. I knew what kind of set Mudsdale was now. And Stamina boosts would make damage output difficult for Donphan. I swapped into my Kyurem-Black as he set up his Stealth Rock.
- I went for the Substitute expecting the switch. He does in fact switch into Escavalier.
- I get off an Earth Power as he goes for the Knock Off and breaks my Sub.
- That low Earth Power damage tells me that he is either Assault Vest or very specially bulky. Either way, there isn't much that Kyurem can do to this thicc Bug. So I switched back into Donphan to tank the hit and lose my Assault Vest to another Knock Off.
- Connor sends back in Mudsdale to take whatever my Donphan wants to dish out as I Rapid Spin away the Stealth Rock.
- Back into Kyurem I go, as my opponent decides to Earthquake.
- I'm pretty sure that he's just going to bring back in the Escavalier. I pull a last season strat by trying to freeze the incoming wall, but to no success.
- I went into Electivire to take the Iron Head coming my way.
- Here comes Rotom-Wash on the Wild Charge, which does good damage.
- I get off a Toxic on the Rotom-Wash just before Electivire goes down to a Hydro Pump. I didn't really want to make the hard Kyurem switch since it was a little too low on health for my liking. I sent Sylveon onto the field.
- If Rotom-Wash was Choice locked, it was Choice locked into Hydro Pump. I threw off a Wish just in case he wanted to attack. He reveals Pain Split which confirms him to not have a Choice item. Therefore, I no longer have to fear the Trick from it.
- I tried to catch the Escavalier coming in by using Hidden Power Fire, but Connor makes a more mid-ground play by opting for Mudsdale.
- Scouting the damage of Mudsdale, I decided to go for Wish. Unfortunately, Heavy Slam from it is a 2HKO. That means that I cannot hope to stall it out. So on the following turn, I had Sylveon keep the Wish for itself so that it could remain healthy. Connor expecting a switch (probably my Salazzle or Donphan to come in and take the Heavy Slam).
- I switch hard into Donphan to take the Heavy Slam, but he opts for Toxic. Glad he didn't go for that earlier.
- I went for Earthquake to bring this Mudsdale into a better KO range for my Pokemon in the back. He decides to get his Stealth Rock up again.
- Rotom-Wash comes in to eat a hit, but I want those rocks off the field. So I use Rapid Spin.
- Once again, my Kyurem is still rather low. I sac Donphan to the Hydro Pump. Unfortunately, this means that Rotom-Wash can freely Volt Switch around my team. I went back into Sylveon.
- I used Wish as the Rotom-Wash stayed in to Hydro Pump. The next turn, I brought in Kyurem-B to take the Wish. The Pain Split does nothing, and now I am free to set up Substitute in the face of this Rotom-Wash.
- I went for Earth Power to catch the Escavalier once again. I just needed to keep chipping it down.
- Connor makes a great play by bringing in Mudsdale as I switch to my Salazzle.
- Unfortunately, Flamethrower is not enough to kill the bulky horse and Salazzle is easily KO'd by an Earthquake. At this point, I am down 3-6. And I just lost the Pokemon that I wanted to sweep his whole team with. I bring in my Kyurem-B.
- Just kidding! It was my sneaky boi, Zoroark. He picks up the KO on Mudsdale with Knock Off. This definitely helps me out a bit. Finally being able to KO one of his mons. Zoroark has one kill. Connor sends back in his Escavalier.
- This is exactly what I wanted. To bait the Escavalier out. Unfortunately, I've already revealed Knock Off, so Connor knows that this is Zoroark and brings out Conkeldurr. Conkeldurr loses it's Assault Vest. So much special bulk on this team. Makes me wonder if Salazzle really stood a chance of sweeping honestly. Sheesh.
- I brought out my Sylveon to take the Fighting type move, but Connor reads into that and Poison Jabs. It does a lot of damage.
- So. Since his Conkeldurr doesn't have the Assault Vest anymore, I am confident that I can KO it with Hyper Voice. Thinking ahead to the next turn, I wanted to make sure that my Sylveon was healthy enough to take a hit from whatever wanted to come in. I mean - barring the Escavalier. I went for Protect for the Leftovers recovery as Connor switches into Rotom-Wash.
- Since Protect failed the last turn, I opted for some more free recovery, while Rotom-Wash goes for Volt Switch.
- Connor decides no more messing around and launches off a Hydro Pump. Sylveon survives and I get my Wish off.
- I use Protect as Mega Alakazam comes in.
- I switch into my Zoroark to take the incoming Psychic.
- I go for U-turn the following turn, just in case he switches. It does a massive amount of damage. I went into Sylveon expecting the Focus Blast, which does come out.
- Mega Alakazam goes for another Psychic as I get my Wish up.
- Mega Alakazam retreats for Rotom-Wash as my Protect fails again.
- Knowing that I can take anything Rotom-Wash wants to go for, I set up yet another Wish as it Pain Splits.
- I proceed to stall out the Rotom-Wash with Toxic and Wish, while using Hyper Voice on turns where I would normally Protect. Eventually, the Rotom falls to the Toxic applied by Electivire. So Electivire gets itself a kill. Connor brings back in Mega Alakzam.
- Sylveon goes for Wish, while Mega Alakazam tries to break it with Psychic.
- Risking the crit, I throw off the Hyper Voice to finish off the Mega Alakazam. That is one kill for Sylveon. The game is tied up 3-3 right now and I feel better now that I'm not gonna get beat 5-0 or 6-0, like I was worried about earlier. Connors opts for his Salamence next.
- Someone call the optometrist, this Salamence needs glasses. It misses an Iron Tail and dies outright to Hyper Voice. That is two kills for Sylveon. I was informed after the battle that Salamence had Wide Lens, so that makes it even worse that it missed since it had heightened accuracy. Anyway, Connor decides to send in his Escavalier now.
- That monster lives my Sylveon's Hidden Power Fire. But Sylveon too shows that it won't be broken so easily and tanks the Iron Head. Another Hidden Power Fire put this Escavalier out of commission. Sylveon's third kill of the game. It is now down to Conkeldurr.
- Where there is a Conkeldurr, there is a way. It is the MVP of this league so far and it could still sweep through my team, being at 83% health. Not wanting to risk a crit Mach Punch, I Protect the first turn for the Leftovers recovery that has been so dear to me all game.
- Conkeldurr's Mach Punch fails to KO and Sylveon gets it's fourth kill of the game to win the match! The Toronto Maple Leafeons close out that game with a 3-0 victory, bringing our season record to 5-1!
In Conclusion
Good game to Connor. I definitely feel like things could have gone a lot differently. I'm not surprised that it took so long for you to receive your first loss. Your team is very well constructed. It reminds me a lot of Ralker's team from last season, which also had a great time in that league and winning him the blue conference. There is a lot of power on this team and I could definitely see it winning the whole thing will your skill and a little luck. 'Cause in Pokemon, you sure gotta rely on it sometimes. Evident by our match.
I won't say that I played the best this match, but I do feel like I played to my outs and Sylveon sure put in a lot of work. Easily the MVP of the game. Something I might've done differently could've been how I played my Kyurem-B after Salazzle went down. Kyurem-B became the Pokemon at the back of my party, and I know how tough it can be to play around Kyurem. So centralizing, that I didn't even have to bring the first three weeks. My opponents still had to be ready for it every time.
Sylveon has slipped passed Electivire as my top Pokemon in the MVP race. I hope that it will put in even more success for me later down the road.
Thank you for reading my report. My next opponent will be Ryan. A veteran of this league. Who knows what kind of tricks he may have up his sleeve? Until then, I will see you later. This is Tommy aka AbruptFury, signing out.
Tuesday, 6 February 2018
NBA Season 6 Week 5: Toronto Maple Leafeons
Greetings, mes amies! This is once again Tommy aka AbruptFury. I am the coach of the Toronto Maple Leafeons. And I am here to give you my report for my latest match.
This week, I faced yet another newcomer to the National Battling Association. His name is Ryo. He has himself a Youtube with some other league stuff he has doing, so I know that he is experienced in the format. His team is also ungodly bulky. Clefable, Suicune, Celesteela, and Cresselia. All Pokemon that are tough to break. He also managed to get himself Krookodile and Arcanine, so he has that Intimidate option, and rounds out his bulk with some heavy offensive power. They are probably two of the best Pokemon of their types to have in a league format. I myself have drafted Arcanine many a time. So let's see if we can't BREAK THE WALLS DOWN!
The Team Line-ups
My Team : Kyurem-B, Scizor, Sylveon, Vaporeon, Salazzle(Z), Zoroark, Electivire(Z), Dhelmise, Donphan, Mesprit(Z), Sawk
Ryo (Pittsburgh Huge Powers): Celesteela, Latios, Cresselia, Krookodile(Z), Arcanine(Z), Froslass, Roselia, Clefable, Hitmonlee, Piloswine, Suicune(Z)
The Game Plan
Bane (Kyurem-Black) @ Life Orb
Ability: Teravolt
EVs: 4 Atk / 252 SpA / 252 Spe
Naive Nature
- Ice Beam
- Iron Head
- Fusion Bolt
- Roost
Kyurem-Black has an extremely good matchup against my opponent's team. The type coverage in it's movepool is absolutely perfect here. Ice Beam hurts Latios, Krookodile, and Roselia (as well as most other things). Iron Head breaks Clefable, Froslass, and Piloswine. And Fusion Bolt hits Celesteela and Suicune for big damage. Fusion Bolt can also KO his Hitmonlee if it switches in. Initially, I wanted Substitute on this set, but Life Orb attacks were so good, and Life Orb can really chip down my main attacker. So I decided that Roost would be the better way to go. I could've just relied on Vaporeon, but it wouldn't have been too good if I lost it. Eventually, Kyurem-B would probably succumb to the Life Orb recoil and Stealth Rock (if I weren't able to remove it).
Offensive Calcs:
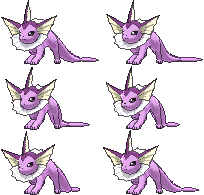
Ability: Teravolt
EVs: 4 Atk / 252 SpA / 252 Spe
Naive Nature
- Ice Beam
- Iron Head
- Fusion Bolt
- Roost
Kyurem-Black has an extremely good matchup against my opponent's team. The type coverage in it's movepool is absolutely perfect here. Ice Beam hurts Latios, Krookodile, and Roselia (as well as most other things). Iron Head breaks Clefable, Froslass, and Piloswine. And Fusion Bolt hits Celesteela and Suicune for big damage. Fusion Bolt can also KO his Hitmonlee if it switches in. Initially, I wanted Substitute on this set, but Life Orb attacks were so good, and Life Orb can really chip down my main attacker. So I decided that Roost would be the better way to go. I could've just relied on Vaporeon, but it wouldn't have been too good if I lost it. Eventually, Kyurem-B would probably succumb to the Life Orb recoil and Stealth Rock (if I weren't able to remove it).
Offensive Calcs:
- Speedties other base 95s like Arcanine.
- 252 SpA Life Orb Teravolt Kyurem-Black Ice Beam vs. 0 HP / 4 SpD Latios: 330-393 (109.6 - 130.5%) -- guaranteed OHKO
- 4 Atk Life Orb Teravolt Kyurem-Black Fusion Bolt vs. 0 HP / 4 Def Celesteela: 291-343 (86.8 - 102.3%) -- 93.8% chance to OHKO after Stealth Rock
- 252 SpA Life Orb Teravolt Kyurem-Black Ice Beam vs. 0 HP / 4 SpD Krookodile: 484-569 (146.2 - 171.9%) -- guaranteed OHKO
- 4 Atk Life Orb Teravolt Kyurem-Black Fusion Bolt vs. 252 HP / 132+ Def Celesteela: 234-276 (58.7 - 69.3%) -- guaranteed 2HKO after Leftovers recovery
- 252 SpA Life Orb Teravolt Kyurem-Black Earth Power vs. 248 HP / 0 SpD Arcanine: 291-343 (75.9 - 89.5%) -- guaranteed OHKO after Stealth Rock and Leftovers recovery
- 4 Atk Life Orb Teravolt Kyurem-Black Iron Head vs. 0 HP / 4 Def Froslass: 320-377 (113.8 - 134.1%) -- guaranteed OHKO
- 4 Atk Life Orb Teravolt Kyurem-Black Iron Head vs. 252 HP / 252+ Def Clefable: 211-250 (53.5 - 63.4%) -- guaranteed 2HKO after Leftovers recovery
- 4 Atk Life Orb Teravolt Kyurem-Black Iron Head vs. 252 HP / 0 Def Eviolite Piloswine: 192-229 (47.5 - 56.6%) -- guaranteed 2HKO after Stealth Rock
- 4 Atk Life Orb Teravolt Kyurem-Black Fusion Bolt vs. 0 HP / 4 Def Hitmonlee: 246-290 (102 - 120.3%) -- guaranteed OHKO
- 4 Atk Life Orb Teravolt Kyurem-Black Fusion Bolt vs. 252 HP / 0 Def Suicune: 265-315 (65.5 - 77.9%) -- guaranteed 2HKO after Leftovers recovery
Ariel (Vaporeon) @ Leftovers
Ability: Water Absorb
Shiny: Yes
EVs: 252 HP / 252 Def / 4 SpA
Bold Nature
IVs: 0 Atk
- Scald
- Wish
- Protect
- Haze
Vaporeon has been very useful in taking hits this season, and stalling teams out. Welllll that's what I'm hoping it can do again this week. With strong offensive threats like Krookodile and Arcanine, I knew I wanted something that could deal with both of them well. Sylveon can take hits from Krookodile, but Arcanine resists Fairy type moves and could bop it around while Sylveon struggles to stall it. Of course - with Vaporeon, you gotta watch out for the Wild Charge from Arcanine, but I felt confident in my ability to deal with it after my match against Thunderpunch Buzzwole, and with the rest of the team that I decided to bring. Scald could deal major damage to Krookodile and Arcanine, as well as snag a nice burn. Wish and Protect are pretty standard for me. They just help with healing and scouting. Haze, however, was for this matchup specifically. I didn't feel like Roar would be enough, especially if the match came down to last mon Suicune, because then I wouldn't be able to phaze it out into another Pokemon. Ryo's team has a ton of setup capability in Calm Mind, Swords Dance, Moxie, and Beast Boost.
Offensive Calcs:
Defensive Calcs:

Ability: Water Absorb
Shiny: Yes
EVs: 252 HP / 252 Def / 4 SpA
Bold Nature
IVs: 0 Atk
- Scald
- Wish
- Protect
- Haze
Vaporeon has been very useful in taking hits this season, and stalling teams out. Welllll that's what I'm hoping it can do again this week. With strong offensive threats like Krookodile and Arcanine, I knew I wanted something that could deal with both of them well. Sylveon can take hits from Krookodile, but Arcanine resists Fairy type moves and could bop it around while Sylveon struggles to stall it. Of course - with Vaporeon, you gotta watch out for the Wild Charge from Arcanine, but I felt confident in my ability to deal with it after my match against Thunderpunch Buzzwole, and with the rest of the team that I decided to bring. Scald could deal major damage to Krookodile and Arcanine, as well as snag a nice burn. Wish and Protect are pretty standard for me. They just help with healing and scouting. Haze, however, was for this matchup specifically. I didn't feel like Roar would be enough, especially if the match came down to last mon Suicune, because then I wouldn't be able to phaze it out into another Pokemon. Ryo's team has a ton of setup capability in Calm Mind, Swords Dance, Moxie, and Beast Boost.
Offensive Calcs:
- 4 SpA Vaporeon Scald vs. 0 HP / 4 SpD Arcanine: 224-266 (69.7 - 82.8%) -- guaranteed 2HKO
- 4 SpA Vaporeon Scald vs. 0 HP / 0 SpD Krookodile: 254-300 (76.7 - 90.6%) -- guaranteed 2HKO
- 4 SpA Vaporeon Scald vs. 0 HP / 4 SpD Hitmonlee: 87-103 (36 - 42.7%) -- guaranteed 3HKO
Defensive Calcs:
- +3 0 SpA Suicune Hidden Power Electric vs. 252 HP / 0 SpD Vaporeon: 206-244 (44.3 - 52.5%) -- guaranteed 3HKO after Leftovers recovery
- 252+ SpA Celesteela Giga Drain vs. 252 HP / 0 SpD Vaporeon: 164-194 (35.3 - 41.8%) -- 83.4% chance to 3HKO after Leftovers recovery
- 252 Atk Arcanine Gigavolt Havoc (175 BP) vs. 252 HP / 252+ Def Vaporeon: 334-394 (71.9 - 84.9%) -- guaranteed 2HKO after Leftovers recovery
- 252 Atk Choice Band Arcanine Wild Charge vs. 252 HP / 252+ Def Vaporeon: 258-304 (55.6 - 65.5%) -- guaranteed 2HKO after Leftovers recovery
- 252 Atk Life Orb Arcanine Wild Charge vs. 252 HP / 252+ Def Vaporeon: 224-265 (48.2 - 57.1%) -- 36.3% chance to 2HKO after Leftovers recovery
- 252 Atk Krookodile Earthquake vs. 252 HP / 252+ Def Vaporeon: 150-177 (32.3 - 38.1%) -- 0.8% chance to 3HKO after Leftovers recovery
- 252 Atk Choice Band Krookodile Earthquake vs. 252 HP / 252+ Def Vaporeon: 223-264 (48 - 56.8%) -- 36.3% chance to 2HKO after Leftovers recovery
- 252+ Atk Reckless Hitmonlee High Jump Kick vs. 252 HP / 252+ Def Vaporeon: 261-307 (56.2 - 66.1%) -- guaranteed 2HKO after Leftovers recovery | I can Protect and gain enough recovery from Lefties to live the next hit. Hi Jump Kick crash does 50% to him.

Lisa Simpson (Salazzle) @ Poisonium Z
Ability: Corrosion
Shiny: Yes
EVs: 56 HP / 252 SpA / 200 Spe
Timid Nature
IVs: 0 Atk
- Flamethrower
- Sludge Wave
- Encore
- Nasty Plot
Salazzle has another good matchup this week. Which is very good. I'm glad I can get some use out this pick, since I was so on the fence about it. Another Nasty Plot set to be able to sweep my opponent if I can get going. This also works best if I can get rid of some items on my opponent's Pokemon, so I tried to incorporate some Knock Off onto my team as you will see later on. Flamethrower does a number to Celesteela, Roselia, Froslass, and even Eviolite Piloswine. Sludge Wave hits Clefable. If Salazzle has a Nasty Plot boost, nothing is really safe. Especially if I get chip on certain Pokemon like Suicune and Cresselia. Poisonium Z is meant for those two if I can get a little bit of chip onto Clefable. Having it switch into one of my Knock Off users would be ideal, since it might be Magic Guard instead of Unaware, and won't take hazard damage. Encore is meant to look something like Clefable, Roselia, or Froslass into a move that can't really do much to Salazzle. This could work after one of my Pokemon get taken out or on a good switch. Otherwise, I might take some unnecessary damage or status move. This would make it easy to get off a Nasty Plot to help sweep Ryo's team.
Offensive Calcs:
Defensive Calcs:
Ability: Corrosion
Shiny: Yes
EVs: 56 HP / 252 SpA / 200 Spe
Timid Nature
IVs: 0 Atk
- Flamethrower
- Sludge Wave
- Encore
- Nasty Plot
Salazzle has another good matchup this week. Which is very good. I'm glad I can get some use out this pick, since I was so on the fence about it. Another Nasty Plot set to be able to sweep my opponent if I can get going. This also works best if I can get rid of some items on my opponent's Pokemon, so I tried to incorporate some Knock Off onto my team as you will see later on. Flamethrower does a number to Celesteela, Roselia, Froslass, and even Eviolite Piloswine. Sludge Wave hits Clefable. If Salazzle has a Nasty Plot boost, nothing is really safe. Especially if I get chip on certain Pokemon like Suicune and Cresselia. Poisonium Z is meant for those two if I can get a little bit of chip onto Clefable. Having it switch into one of my Knock Off users would be ideal, since it might be Magic Guard instead of Unaware, and won't take hazard damage. Encore is meant to look something like Clefable, Roselia, or Froslass into a move that can't really do much to Salazzle. This could work after one of my Pokemon get taken out or on a good switch. Otherwise, I might take some unnecessary damage or status move. This would make it easy to get off a Nasty Plot to help sweep Ryo's team.
Offensive Calcs:
- Outspeeds max speed Latios and Froslass by 2 points. Couldn't just make it one.
- 252 SpA Salazzle Flamethrower vs. 252 HP / 124 SpD Celesteela: 234-276 (58.7 - 69.3%) -- guaranteed 2HKO after Leftovers recovery
- 252 SpA Salazzle Flamethrower vs. 4 HP / 0 SpD Celesteela: 260-308 (77.3 - 91.6%) -- guaranteed 2HKO
- +2 252 SpA Salazzle Flamethrower vs. 232 HP / 24 SpD Eviolite Thick Fat Piloswine: 254-302 (63.6 - 75.6%) -- guaranteed 2HKO
- +2 252 SpA Salazzle Sludge Wave vs. 252 HP / 40 SpD Suicune: 237-280 (58.6 - 69.3%) -- guaranteed 2HKO after Leftovers recovery
- +2 252 SpA Salazzle Sludge Wave vs. 0 HP / 4 SpD Suicune: 246-289 (72.1 - 84.7%) -- guaranteed 2HKO after Leftovers recovery
- 252 SpA Salazzle Acid Downpour (175 BP) vs. 252 HP / 4 SpD Clefable: 558-656 (141.6 - 166.4%) -- guaranteed OHKO after Leftovers recovery
- 252 SpA Salazzle Sludge Wave vs. 252 HP / 4 SpD Clefable: 306-360 (77.6 - 91.3%) -- guaranteed 2HKO after Leftovers recovery
- +2 252 SpA Salazzle Sludge Wave vs. 0 HP / 4 SpD Latios: 255-301 (84.7 - 100%) -- 81.3% chance to OHKO after Stealth Rock
- +2 252 SpA Salazzle Flamethrower vs. 0 HP / 4 SpD Krookodile: 351-414 (106 - 125%) -- guaranteed OHKO
- +2 252 SpA Salazzle Sludge Wave vs. 248 HP / 0 SpD Arcanine: 334-394 (87.2 - 102.8%) -- guaranteed OHKO after Stealth Rock and Leftovers recovery
- +2 252 SpA Salazzle Sludge Wave vs. 0 HP / 0 SpD Arcanine: 334-394 (104 - 122.7%) -- guaranteed OHKO
Defensive Calcs:
- 0 SpA Suicune Scald vs. 56 HP / 0 SpD Salazzle: 240-284 (82.4 - 97.5%) -- guaranteed 2HKO
- 252+ Atk Piloswine Ice Shard vs. 56 HP / 0 Def Salazzle: 45-54 (15.4 - 18.5%) -- possible 6HKO
- 252 Atk Choice Band Arcanine Extreme Speed vs. 56 HP / 0 Def Salazzle: 175-207 (60.1 - 71.1%) -- guaranteed 2HKO
Dr Claw (Scizor) @ Choice Band
Ability: Technician
EVs: 252 Atk / 4 SpD / 252 Spe
Adamant Nature
- Bullet Punch
- U-turn
- Knock Off
- Defog
I knew Scizor's Banded U-turn would be useful to have in this matchup. Big damage off on Cresselia and Suicune. Gets me out of an Arcanine switch in so that I may go into something with a better matchup. Bullet Punch is amazing when it comes to revenge killing weakened foes and frail Pokemon like Hitmonlee and Froslass. It would also be a good way of dealing with Clefable, a very defensive Pokemon. Knock Off helps remove items like a Choice Scarf on Latios, Krookodile, and Arcanine, Leftovers on Clefable, Suicune, and Celesteela, and Eviolite on Piloswine. All these things would help Salazzle immensely. And Defog was a bit of filler, but also for the fact that I had no other hazard control. Choice Band gives Scizor a lot of power in beating Pokemon down with it's attacks.
Offensive Calcs:
Ability: Technician
EVs: 252 Atk / 4 SpD / 252 Spe
Adamant Nature
- Bullet Punch
- U-turn
- Knock Off
- Defog
I knew Scizor's Banded U-turn would be useful to have in this matchup. Big damage off on Cresselia and Suicune. Gets me out of an Arcanine switch in so that I may go into something with a better matchup. Bullet Punch is amazing when it comes to revenge killing weakened foes and frail Pokemon like Hitmonlee and Froslass. It would also be a good way of dealing with Clefable, a very defensive Pokemon. Knock Off helps remove items like a Choice Scarf on Latios, Krookodile, and Arcanine, Leftovers on Clefable, Suicune, and Celesteela, and Eviolite on Piloswine. All these things would help Salazzle immensely. And Defog was a bit of filler, but also for the fact that I had no other hazard control. Choice Band gives Scizor a lot of power in beating Pokemon down with it's attacks.
Offensive Calcs:
- 252+ Atk Choice Band Scizor U-turn vs. 252 HP / 232+ Def Cresselia: 242-288 (54.5 - 64.8%) -- guaranteed 2HKO after Leftovers recovery
- 252+ Atk Choice Band Scizor U-turn vs. 4 HP / 0 Def Suicune: 168-198 (49.1 - 57.8%) -- guaranteed 2HKO after Stealth Rock and Leftovers recovery
- 252+ Atk Choice Band Scizor U-turn vs. 0 HP / 4 Def Latios: 452-534 (150.1 - 177.4%) -- guaranteed OHKO
- 252+ Atk Choice Band Technician Scizor Bullet Punch vs. 252 HP / 252+ Def Clefable: 284-336 (72 - 85.2%) -- guaranteed 2HKO after Leftovers recovery
- -1 252+ Atk Choice Band Scizor U-turn vs. 0 HP / 4 Def Krookodile: 302-356 (91.2 - 107.5%) -- 81.3% chance to OHKO after Stealth Rock
- 252+ Atk Choice Band Scizor U-turn vs. 0 HP / 4 Def Krookodile: 452-534 (136.5 - 161.3%) -- guaranteed OHKO
- 252+ Atk Choice Band Scizor U-turn vs. 252 HP / 32 Def Eviolite Roselia: 220-261 (72.3 - 85.8%) -- guaranteed 2HKO
- 252+ Atk Choice Band Technician Scizor Bullet Punch vs. 232 HP / 0 Def Eviolite Piloswine: 260-308 (65.1 - 77.1%) -- guaranteed 2HKO | Knock Off + Bullet Punch will easily beat it.
- 252+ Atk Choice Band Technician Scizor Bullet Punch vs. 0 HP / 4 Def Hitmonlee: 267-315 (110.7 - 130.7%) -- guaranteed OHKO
- -1 252+ Atk Choice Band Technician Scizor Bullet Punch vs. 248 HP / 252+ Def Arcanine: 45-53 (11.7 - 13.8%) -- possibly the worst move ever | Just in case it is within range, I don't have to risk anything else on the switch.
- - 252+ Atk Choice Band Technician Scizor Bullet Punch vs. 4 HP / 0 Def Froslass: 434-512 (153.9 - 181.5%) -- guaranteed OHKO
Defensive Calcs:
- 252 SpA Suicune Hydro Pump vs. 0 HP / 4 SpD Scizor: 168-198 (59.7 - 70.4%) -- guaranteed 2HKO
- +1 4 SpA Cresselia Hidden Power Fire vs. 0 HP / 4 SpD Scizor: 248-292 (88.2 - 103.9%) -- 18.8% chance to OHKO
- 252 Atk Krookodile Earthquake vs. 0 HP / 0 Def Scizor: 153-180 (54.4 - 64%) -- guaranteed 2HKO
Spark Plug (Electivire) @ Expert Belt
Ability: Motor Drive
EVs: 24 HP / 252 Atk / 232 Spe
Jolly Nature
- Wild Charge
- Ice Punch
- Low Sweep
- Toxic
Electivire was meant to deal with Celesteela and Suicune, two big threats that my opponent would likely bring. They can be tough, bulky sweepers. Wild Charge would beat them down nice though. Ice Punch was for Latios, Krookodile, and Roselia. Low Sweep was mostly meant to slow things down (such as Krookodile, Arcanine, and Latios), but could also damage Krookodile and Piloswine. Toxic was for wearing down bulky threats like Cresselia and Suicune if they didn't have Rest. This was probably one of the more essential teammates for this match. I needed to be wary of Krookodile and Earthquake/Stomping Tantrum from Celesteela though.
Offensive Calcs:
Defensive Calcs:
Dumbo (Donphan) @ Leftovers
Ability: Sturdy
EVs: 240 HP / 24 Atk / 236 Def / 8 Spe
Impish Nature
- Stealth Rock
- Earthquake
- Knock Off
- Roar
Donphan could tank hits from the likes of Hitmonlee (which nothing else really wanted to), Krookodile, and Arcanine. It was my way of setting up Stealth Rock this week, which I knew I wanted to have against this kind of team. It helped Salazzle's offensive damage output and made it easier for Salazzle to stay alive because it didn't have to risk missing out on the KO. Earthquake would make quick work of Arcanine without recovery, Krookodile, and Hitmonlee. |Knock Off would get rid of pesky items. And Roar would force the switch on a Pokemon that was trying to set up on me. Extremely useful against Suicune and Cresselia which could otherwise just set up in front of it without fearing much.
Offensive Calcs:
Ability: Motor Drive
EVs: 24 HP / 252 Atk / 232 Spe
Jolly Nature
- Wild Charge
- Ice Punch
- Low Sweep
- Toxic
Electivire was meant to deal with Celesteela and Suicune, two big threats that my opponent would likely bring. They can be tough, bulky sweepers. Wild Charge would beat them down nice though. Ice Punch was for Latios, Krookodile, and Roselia. Low Sweep was mostly meant to slow things down (such as Krookodile, Arcanine, and Latios), but could also damage Krookodile and Piloswine. Toxic was for wearing down bulky threats like Cresselia and Suicune if they didn't have Rest. This was probably one of the more essential teammates for this match. I needed to be wary of Krookodile and Earthquake/Stomping Tantrum from Celesteela though.
Offensive Calcs:
- Outspeeds max speed Krookodile by 1 point.
- 252 Atk Expert Belt Electivire Wild Charge vs. 0 HP / 4 Def Celesteela: 331-391 (98.8 - 116.7%) -- guaranteed OHKO after Stealth Rock
- 252 Atk Expert Belt Electivire Wild Charge vs. 0 HP / 4 Def Suicune: 302-355 (88.5 - 104.1%) -- guaranteed OHKO after Stealth Rock and Leftovers recovery
- 252 Atk Expert Belt Electivire Wild Charge vs. 252 HP / 0 Def Suicune: 305-360 (75.4 - 89.1%) -- guaranteed 2HKO after Leftovers recovery
- 252 Atk Expert Belt Electivire Low Sweep vs. 232 HP / 0 Def Eviolite Piloswine: 134-158 (33.5 - 39.5%) -- guaranteed 3HKO
- 252 Atk Expert Belt Electivire Low Sweep vs. 232 HP / 0 Def Piloswine: 199-235 (49.8 - 58.8%) -- guaranteed 2HKO after Stealth Rock
- -1 252 Atk Expert Belt Electivire Low Sweep vs. 0 HP / 4 Def Krookodile: 132-156 (39.8 - 47.1%) -- guaranteed 3HKO
- -1 252 Atk Expert Belt Electivire Ice Punch vs. 0 HP / 4 Def Krookodile: 151-180 (45.6 - 54.3%) -- 54.3% chance to 2HKO
- 252 Atk Expert Belt Electivire Low Sweep vs. 0 HP / 4 Def Krookodile: 197-233 (59.5 - 70.3%) -- guaranteed 2HKO
- 252 Atk Expert Belt Electivire Ice Punch vs. 0 HP / 4 Def Krookodile: 228-269 (68.8 - 81.2%) -- guaranteed 2HKO
- 252 Atk Expert Belt Electivire Ice Punch vs. 0 HP / 0 Def Latios: 228-269 (75.7 - 89.3%) -- guaranteed 2HKO
- 252 Atk Expert Belt Electivire Ice Punch vs. 252 HP / 32 Def Eviolite Roselia: 223-264 (73.3 - 86.8%) -- guaranteed 2HKO
Defensive Calcs:
- 252+ Atk Celesteela Earthquake vs. 0 HP / 24 Def Electivire: 270-318 (92.7 - 109.2%) -- 56.3% chance to OHKO
- 252 SpA Suicune Hydro Pump vs. 0 HP / 0 SpD Electivire: 160-190 (54.9 - 65.2%) -- guaranteed 2HKO
Ability: Sturdy
EVs: 240 HP / 24 Atk / 236 Def / 8 Spe
Impish Nature
- Stealth Rock
- Earthquake
- Knock Off
- Roar
Donphan could tank hits from the likes of Hitmonlee (which nothing else really wanted to), Krookodile, and Arcanine. It was my way of setting up Stealth Rock this week, which I knew I wanted to have against this kind of team. It helped Salazzle's offensive damage output and made it easier for Salazzle to stay alive because it didn't have to risk missing out on the KO. Earthquake would make quick work of Arcanine without recovery, Krookodile, and Hitmonlee. |Knock Off would get rid of pesky items. And Roar would force the switch on a Pokemon that was trying to set up on me. Extremely useful against Suicune and Cresselia which could otherwise just set up in front of it without fearing much.
Offensive Calcs:
- Speed creeps speedcreeping Piloswine (since both are in the same speed tier, but tend to run full bulk).
- 24 Atk Donphan Earthquake vs. 0 HP / 4 Def Arcanine: 308-366 (95.9 - 114%) -- 75% chance to OHKO
- 24 Atk Donphan Earthquake vs. 0 HP / 4 Def Krookodile: 154-183 (46.5 - 55.2%) -- 98.8% chance to 2HKO after Stealth Rock
- -1 24 Atk Donphan Earthquake vs. 0 HP / 4 Def Krookodile: 103-123 (31.1 - 37.1%) -- 100% chance to 3HKO after Stealth Rock
- 24 Atk Donphan Earthquake vs. 232 HP / 0 Def Eviolite Piloswine: 103-123 (25.8 - 30.8%) -- guaranteed 4HKO | Good calc for knowing if I should attack or switch.
- 24 Atk Donphan Earthquake vs. 232 HP / 0 Def Piloswine: 154-183 (38.5 - 45.8%) -- guaranteed 3HKO
- 24 Atk Donphan Earthquake vs. 0 HP / 4 Def Hitmonlee: 211-250 (87.5 - 103.7%) -- 62.5% chance to OHKO after Stealth Rock
- 24 Atk Donphan Knock Off (97.5 BP) vs. 0 HP / 4 Def Latios: 200-236 (66.4 - 78.4%) -- guaranteed 2HKO
- 24 Atk Donphan Knock Off (97.5 BP) vs. 252 HP / 232+ Def Cresselia: 108-128 (24.3 - 28.8%) -- possible 5HKO after Leftovers recovery | No guarantee that Substitute would remain intact.
- 24 Atk Donphan Knock Off (97.5 BP) vs. 0 HP / 4 Def Froslass: 222-262 (79 - 93.2%) -- guaranteed OHKO after Stealth Rock
Defensive Calcs:
- 252 Atk Choice Band Krookodile Earthquake vs. 240 HP / 236+ Def Donphan: 145-172 (38 - 45.1%) -- guaranteed 3HKO after Leftovers recovery
- 252 Atk Life Orb Arcanine Flare Blitz vs. 240 HP / 236+ Def Donphan: 146-173 (38.3 - 45.4%) -- guaranteed 3HKO after Leftovers recovery
- 252+ Atk Reckless Hitmonlee High Jump Kick vs. 240 HP / 236+ Def Donphan: 169-201 (44.3 - 52.7%) -- guaranteed 3HKO after Leftovers recovery
The Aftermath
Here is the battle link: https://replay.pokemonshowdown.com/battlearea-gen7draftleague-32795
Week 5: Toronto Maple Leafeons (AbruptFury) vs. Pittsburgh Huge Powers (Ryohyamaru)
Team that Ryo brought: Latios, Celesteela, Arcanine, Roselia, Piloswine, Krookodile
--------------------------------------------------------------------------------------------------------------------------
Match Summary and Explanations
- I decided to lead my Donphan to get up rocks in the beginning of the match. I figured he might just do the same. I led Donphan into Latios.
- I just decided to get up my Stealth Rock as he reveals himself to be Hidden Power Ice.
- Knowing that he can't touch my Scizor with his Latios, I switch into Scizor as he makes a great read and goes into Arcanine.
- That play forced me into a position where I had to take either a Flare Blitz or Wild Charge/Gigavolt Havoc. I decided to risk the Electric attack and went Vaporeon. He just goes for an Extremespeed, but unfortunately it gets a crit.
- An Electric attack would be the end of Vaporeon, but a good prediction with Arcanine could get him some good damage against Electivire while I try to get the Motor Drive boost. So I just went for Protect trying to see what he wanted to go for. He went into Roselia.
- Fearing the Grass type move, I brought in my Kyurem-Black. Roselia goes for Leaf Storm and it does a huge chunk. This all but confirms that that thing is Choice Specs.
- Since he lost a lot of offense pressure with the Special Attack drop, I decided to go for a safe Roost as he switched out Roselia for Piloswine.
- I knew I wouldn't be able to more than a 3HKO against Eviolite Piloswine, so I swapped Kyurem-B out for Vaporeon. Vaporeon took the Earthquake not as good as I'd hoped.
- I risked the crit and went for Wish. I did not get crit and lived to Protect the next turn. Piloswine got up it's Stealth Rock.
- I went for another Wish as Roselia came in. I let my Vaporeon have it to keep it healthy because I knew it was important for the matchup. It could reliably switch in to his threats so well.
- However, Roselia forced me to switch again. This time into Scizor, who took the attack better than Kyurem-B. Nice 4x resist.
- So he goes into Celesteela. I knew he would want to switch, so I tried to knock off and important item. Leftovers on Celesteela wasn't really anything scaring me, but it's nice that it lost it's recovery item.
- I didn't think that he would go for Heavy Slam on a Scizor, so I switched into Kyurem-B and took the Earthquake comfortably.
- Kyurem-B goes for Fusion Bolt and knocks out the Celesteela. First blood goes to Kyurem-B. In comes Latios.
- I knew Latios could easily revenge kill by dropping a Draco, so I brought back in Scizor. He reveals himself to be Dragon Dance and I get a little scared.
- Earthquake takes out Scizor as I try to get a U-turn off. I was not bulky enough to survive it. There's only one mon I can depend on now, and that is Haze Vaporeon!
- Vaporeon takes the boosted Zen Headbutt and does not flinch, luckily. It gets the Haze off and Latios' stats are back to neutral.
- I got my Wish up once again as Latios tries to flinch me or get some damage with Zen Headbutt.
- I didn't want Latios Dragon Dancing for free on my Protect so I threw off a Scald, it went into Roselia as it came in though.
- I decided to sack Donphan for the free Salazzle switch and setup.
- He brings in Arcanine on my Nasty Plot.
- Espeed does a lot of damage, but Salazzle gets the KO with Acid Downpour. I could've saved it for something else in the back, but I didn't even know if Salazzle would survive the Espeed or if the Arcanine might be Assault Vest since Extremespeed was a crit. Anyway, kill for Salazzle. Piloswine returns.
- I thought Salazzle might live an Ice Shard due to it being resisted, but Salazzle was too worn down. I send Vaporeon back in.
- I decided to Wish first to scout what he might go for. I'm glad I did since Piloswine got a crit with it's Earthquake.
- Knowing I was faster than Piloswine, I threw off a Scald. In came Latios, and no burn. Vaporeon was healed.
- My plan was to keep switching between Wish and Scald/Haze. I knew I would neutralize Latios eventually. It was only a matter of time.
- I knew Latios' whole moveset and knew that it couldn't do anything to Kyurem-B with that burn. So I passed a Wish into it as it survived the Stealth Rock and Zen Headbutt damage.
- I went for Roost just to solidify my chances against it, and beat the Latios with Ice Beam. Two kills for Kyurem-B. He brings in Krookodile.
- Time to see whether it was Choice Scarf the whole time. It was not. I kind of figured it wasn't when he avoided sending it in on Salazzle, though you could say it was just safer to use Piloswine's priority. But resisted priority is risky unless you know the calcs. Anyway, it might not have been the best call, but my gut told me things would be alright. Ice Beam took out the Krookodile with no trouble. Kyurem-B now has three kills. What a rampage! Ryo sends in Piloswine.
- Piloswine is easily disposed of after two Iron Heads. Kyurem-B gets it's fourth kill of the game. Roselia is the only thing standing.
- Kyurem-B takes out Roselia with Ice Beam and seal up the game 3-0, which 5 kills! An amazing feat! The Toronto Maple Leafeons now stand with a record of 4-1.
In Conclusion
Good game to Ryo! Now - it turned out that Ryo had actually mistakenly prepped for the other Toronto team in the league, the Toronto Staraptors. But in a weird twist of fate, his sets actually kind of worked. Yes, he did leave himself open to be beat by Kyurem-B (since he didn't have a Choice Scarf user or Dragon type move on Latios), but Roselia did a good job in pressuring my Vaporeon's Wish pass support. Everything took a good amount of damage from it, especially after Scizor went down. And the Stealth Rock was weakening my team with every switch I made, so I had to make that Donphan sac to get back some momentum. And the Latios set probably would have won him the game, or beat my team down enough to where he would have won, if he had flinched my Vaporeon to death with Zen Headbutt. The burn was basically needed for me to be able to close out the game safely. That way, Latios couldn't break my Vaporeon. Also, shoutout to Vaporeon for being a glorious wall. But yeah, if there was anything I could take away from that match, it was how thinking out of the box can be a really innovative way of playing this game we call Pokemon.
So week 5 has come to close and we are still standing pretty strong. Next, we face the Miami Mimikyus. They are coached by Connor. Another newcomer to our league. Really make you wonder just how many originals are around when there are so many new faces. Connor's team is very well balanced. It resembles something that Ralker used last season to great success. Connor is currently the last undefeated coach in our league. Let's see if we can't change that, huh. This is Tommy aka AbruptFury, signing out!
Monday, 29 January 2018
NBA Season 6 Week 4: Toronto Maple Leafeons
Hey guys. This is Tommy aka AbruptFury, coach of the Toronto Maple Leafeons here! What a week it has been. I was so busy with work that I ended up getting only a short sleep before a long shift. I'm sitting on a day off now. Finally! And I'm ready to divulge the results for this week. For week 4, our opponent was Sabastian. Another newcomer to this league, but he hasn't taken to it quite as easily as Mike. Sabastian is starting his season with a 0-3 record. I know he wants to win. I know I want to win. But I will definitely feel bad no matter the outcome because if I win, it will mean hurting his record even further. He has some scary threats on his team that gave me a hard matchup. But enough rambling. Let's hop into this thing!
My Team : Kyurem-B, Scizor, Sylveon, Vaporeon, Salazzle(Z), Zoroark, Electivire(Z), Dhelmise, Donphan, Mesprit(Z), Sawk
Sabastian (San Jose Sharpedos): M-Glalie, Thundurus-T, Alola-Marowak, Alola-Muk, Doublade, Cofagrigus(Z), Alola-Persian(Z), Exploud, Hitmontop(Z), Alola-Ninetales, Latias

The Team Line-up
Sabastian (San Jose Sharpedos): M-Glalie, Thundurus-T, Alola-Marowak, Alola-Muk, Doublade, Cofagrigus(Z), Alola-Persian(Z), Exploud, Hitmontop(Z), Alola-Ninetales, Latias
The Game Plan

Bane (Kyurem-Black) @ Life Orb
Ability: Teravolt
Shiny: Yes
EVs: 252 SpA / 4 SpD / 252 Spe
Timid Nature
IVs: 0 Atk
- Ice Beam
- Earth Power
- Draco Meteor
- Substitute
It finally made it's debut! I finally felt like I could just comfortably hit my opponent's team without it leading to myself getting reverse swept. Offensively, there is nothing it doesn't deal good damage to, except for an Assault Vest user that it doesn't hit for super effective. Ice Beam hits Thundurus-T and Latias. Draco Meteor can also hit Latias, and deals great damage to anything that isn't immune or resisting the hit. Earth Power breaks something like Alolan-Marowak, Alolan-Muk, and Doublade down (and it was Kyurem's only way of hitting Alola-Ninetales). Substitute would be nice to set up on a predicted switch to give myself more free opportunities for damage, and less for being KO'd. In retrospect, Roost might've proved more useful since I don't think anything was passive enough to set a Substitute up on. Life Orb boosted attacks from Kyurem-Black might prove too powerful for my opponent to take.
Offensive Calcs:
Defensive Calcs:
Ability: Teravolt
Shiny: Yes
EVs: 252 SpA / 4 SpD / 252 Spe
Timid Nature
IVs: 0 Atk
- Ice Beam
- Earth Power
- Draco Meteor
- Substitute
It finally made it's debut! I finally felt like I could just comfortably hit my opponent's team without it leading to myself getting reverse swept. Offensively, there is nothing it doesn't deal good damage to, except for an Assault Vest user that it doesn't hit for super effective. Ice Beam hits Thundurus-T and Latias. Draco Meteor can also hit Latias, and deals great damage to anything that isn't immune or resisting the hit. Earth Power breaks something like Alolan-Marowak, Alolan-Muk, and Doublade down (and it was Kyurem's only way of hitting Alola-Ninetales). Substitute would be nice to set up on a predicted switch to give myself more free opportunities for damage, and less for being KO'd. In retrospect, Roost might've proved more useful since I don't think anything was passive enough to set a Substitute up on. Life Orb boosted attacks from Kyurem-Black might prove too powerful for my opponent to take.
Offensive Calcs:
- Speed ties Modest Alola-Ninetales by 1 point.
- 252 SpA Life Orb Teravolt Kyurem-Black Draco Meteor vs. 0 HP / 4 SpD Exploud: 337-398 (96.5 - 114%) -- guaranteed OHKO after Stealth Rock
- 252 SpA Life Orb Teravolt Kyurem-Black Earth Power vs. 0 HP / 4 SpD Marowak-Alola: 291-343 (111.4 - 131.4%) -- guaranteed OHKO
- 252 SpA Life Orb Teravolt Kyurem-Black Earth Power vs. 252 HP / 4 SpD Assault Vest Muk-Alola: 161-192 (38.8 - 46.3%) -- guaranteed 3HKO
- 252 SpA Life Orb Teravolt Kyurem-Black Earth Power vs. 252 HP / 4 SpD Muk-Alola: 242-286 (58.4 - 69%) -- guaranteed 2HKO
- 252 SpA Life Orb Teravolt Kyurem-Black Earth Power vs. 240 HP / 16 SpD Eviolite Doublade: 276-325 (86.5 - 101.8%) -- 50% chance to OHKO after Stealth Rock
- 252 SpA Life Orb Teravolt Kyurem-Black Ice Beam vs. 248 HP / 8 SpD Cofagrigus: 173-204 (54.2 - 63.9%) -- guaranteed 2HKO
- 252 SpA Life Orb Teravolt Kyurem-Black Ice Beam vs. 4 HP / 0 SpD Latias: 289-343 (95.6 - 113.5%) -- guaranteed OHKO after Stealth Rock
- 252 SpA Life Orb Teravolt Kyurem-Black Draco Meteor vs. 252 HP / 0 SpD Latias: 416-494 (114.2 - 135.7%) -- guaranteed OHKO
Defensive Calcs:
- 252+ SpA Choice Specs Exploud Boomburst vs. 0 HP / 4 SpD Kyurem-Black: 321-378 (82 - 96.6%) -- guaranteed 2HKO
- 252 SpA Life Orb Teravolt Kyurem-Black Ice Beam vs. 0 HP / 4 SpD Thundurus-Therian: 437-515 (146.1 - 172.2%) -- guaranteed OHKO
- 252 SpA Thundurus-Therian Focus Blast vs. 0 HP / 4 SpD Kyurem-Black: 308-364 (78.7 - 93%) -- guaranteed 2HKO
Lisa Simpson (Salazzle-Totem) @ Dragonium Z
Ability: Corrosion
EVs: 16 HP / 252 SpA / 240 Spe
Timid Nature
IVs: 0 Atk
- Fire Blast
- Sludge Wave
- Dragon Pulse
- Nasty Plot
Make way for the Lizard Queen! Salazzle actually puts in a ton of work against Sabastian's team with a Nasty Plot boost. I usually opt for accuracy over damage, but I couldn't resist in this case. Fire Blast was a more solid KO on certain Pokemon. Pokemon like Mega Glalie and Doublade. As well as Alolan-Muk without an Assault Vest. And if I got the Nasty Plot boost, I could just use Sludge Wave on most of his other Pokemon. What isn't hit by Sludge Wave, does not want to come in on a Fire Blast from this Pokemon. And Dragon Pulse, with the added boost of Dragonium Z, would be used to deal with his Latias or perhaps his Alolan-Muk. So glad that I picked up this Pokemon when I did. It is already showing how useful it can be to my team.
Offensive Calcs:
Dumbo (Donphan) (M) @ Yache Berry
Ability: Sturdy
EVs: 248 HP / 4 Atk / 108 Def / 148 Spe
Jolly Nature
- Stealth Rock
- Earthquake
- Knock Off
- Rapid Spin
This match was quite the showcase for debuts. I felt like Donphan could really prove useful to me for two reasons. One, it could take a hit from Alolan-Muk and Alolan-Marowak, while threatening a KO. And two, it could withstand a hit from Thundurus-T better than my Vaporeon could, which would otherwise have been my answer to Alolan-Marowak. I decided to make Donphan my hazard setter of the week with Stealth Rock. A useful move in wearing down Sabastian's Pokemon and making it easier for Salazzle to sweep. Earthquake is a great move to have against Doublade, Alolan-Muk, and Alolan-Marowak. Knock Off would be useful in knocking off so many items that could be quite detrimental to me. A possible Light Clay or Focus Sash on Alolan-Ninetales, Thick Club on Alolan-Marowak, Assault Vest on Alolan-Muk, Choice Scarf on Latias, or any item on Thundurus-T. Rapid Spin would clear up any hazards my opponent might want to set up. And Yache Berry helps Donphan take a hit from Mega Glalie, Alolan-Ninetales, and HP Ice Thundurus-T should it's Sturdy be broken by hazards or Alolan-Ninetales' Snow Warning.
Offensive Calcs:
Ability: Corrosion
EVs: 16 HP / 252 SpA / 240 Spe
Timid Nature
IVs: 0 Atk
- Fire Blast
- Sludge Wave
- Dragon Pulse
- Nasty Plot
Make way for the Lizard Queen! Salazzle actually puts in a ton of work against Sabastian's team with a Nasty Plot boost. I usually opt for accuracy over damage, but I couldn't resist in this case. Fire Blast was a more solid KO on certain Pokemon. Pokemon like Mega Glalie and Doublade. As well as Alolan-Muk without an Assault Vest. And if I got the Nasty Plot boost, I could just use Sludge Wave on most of his other Pokemon. What isn't hit by Sludge Wave, does not want to come in on a Fire Blast from this Pokemon. And Dragon Pulse, with the added boost of Dragonium Z, would be used to deal with his Latias or perhaps his Alolan-Muk. So glad that I picked up this Pokemon when I did. It is already showing how useful it can be to my team.
Offensive Calcs:
- Outspeeds max speed Alola-Persian by 2 points. Couldn't do just 1.
- +2 252 SpA Life Orb Salazzle Fire Blast vs. 252 HP / 4 SpD Muk-Alola: 417-491 (100.7 - 118.5%) -- guaranteed OHKO
- +2 252 SpA Salazzle Devastating Drake (160 BP) vs. 252 HP / 0 SpD Latias: 498-586 (136.8 - 160.9%) -- guaranteed OHKO
- 252 SpA Salazzle Devastating Drake (160 BP) vs. 252 HP / 0 SpD Latias: 248-294 (68.1 - 80.7%) -- guaranteed 2HKO
- +2 252 SpA Life Orb Salazzle Sludge Wave vs. 0 HP / 4 SpD Marowak-Alola: 216-255 (82.7 - 97.7%) -- guaranteed OHKO after Stealth Rock
- 252 SpA Salazzle Fire Blast vs. 240 HP / 16 SpD Eviolite Doublade: 368-434 (115.3 - 136%) -- guaranteed OHKO
- 252 SpA Salazzle Fire Blast vs. 0 HP / 0 SpD Glalie-Mega: 390-458 (129.5 - 152.1%) -- guaranteed OHKO
- +2 252 SpA Salazzle Sludge Wave vs. 0 HP / 0 SpD Glalie-Mega: 334-394 (110.9 - 130.8%) -- guaranteed OHKO
- +2 252 SpA Salazzle Sludge Wave vs. 0 HP / 0 SpD Ninetales-Alola with an ally's Aurora Veil: 279-328 (97.2 - 114.2%) -- guaranteed OHKO after Stealth Rock
Ability: Sturdy
EVs: 248 HP / 4 Atk / 108 Def / 148 Spe
Jolly Nature
- Stealth Rock
- Earthquake
- Knock Off
- Rapid Spin
This match was quite the showcase for debuts. I felt like Donphan could really prove useful to me for two reasons. One, it could take a hit from Alolan-Muk and Alolan-Marowak, while threatening a KO. And two, it could withstand a hit from Thundurus-T better than my Vaporeon could, which would otherwise have been my answer to Alolan-Marowak. I decided to make Donphan my hazard setter of the week with Stealth Rock. A useful move in wearing down Sabastian's Pokemon and making it easier for Salazzle to sweep. Earthquake is a great move to have against Doublade, Alolan-Muk, and Alolan-Marowak. Knock Off would be useful in knocking off so many items that could be quite detrimental to me. A possible Light Clay or Focus Sash on Alolan-Ninetales, Thick Club on Alolan-Marowak, Assault Vest on Alolan-Muk, Choice Scarf on Latias, or any item on Thundurus-T. Rapid Spin would clear up any hazards my opponent might want to set up. And Yache Berry helps Donphan take a hit from Mega Glalie, Alolan-Ninetales, and HP Ice Thundurus-T should it's Sturdy be broken by hazards or Alolan-Ninetales' Snow Warning.
Offensive Calcs:
- Outspeeds max speed Adamant Alola-Marowak by 1 point.
- 4 Atk Donphan Earthquake vs. 0 HP / 0 Def Marowak-Alola: 234-276 (89.6 - 105.7%) -- guaranteed OHKO after Stealth Rock
- 4 Atk Donphan Earthquake vs. 0 HP / 4 Def Glalie-Mega: 153-180 (50.8 - 59.8%) -- guaranteed 2HKO
- 4 Atk Donphan Earthquake vs. 248 HP / 0 Def Muk-Alola: 320-380 (77.4 - 92%) -- guaranteed 2HKO
- 4 Atk Donphan Earthquake vs. 240 HP / 0 Def Eviolite Doublade: 120-144 (37.6 - 45.1%) -- guaranteed 3HKO
Defensive Calcs:
- 252+ Atk Thick Club Marowak-Alola Flare Blitz vs. 248 HP / 108 Def Donphan: 241-285 (62.9 - 74.4%) -- guaranteed 2HKO after Leftovers recovery
- 252 Atk Refrigerate Glalie-Mega Double-Edge vs. 248 HP / 108 Def Yache Berry Donphan: 174-205 (45.4 - 53.5%) -- 37.1% chance to 2HKO | Can't survive Explosion without Sturdy unfortunately.
- 252 SpA Ninetales-Alola Blizzard vs. 248 HP / 0 SpD Yache Berry Donphan: 198-234 (51.6 - 61%) -- guaranteed 2HKO after hail damage
- +2 252+ Atk Doublade Shadow Claw vs. 248 HP / 108 Def Donphan: 174-205 (45.4 - 53.5%) -- 37.1% chance to 2HKO
- 136+ Atk Muk-Alola Knock Off (97.5 BP) vs. 248 HP / 108 Def Donphan: 106-126 (27.6 - 32.8%) -- guaranteed 4HKO
Spark Plug (Electivire) (M) @ Icium Z
Ability: Motor Drive
EVs: 16 HP / 252 Atk / 4 Def / 176 SpD / 60 Spe
Adamant Nature
- Ice Punch
- Earthquake
- Brick Break
- Toxic
This Electivire was designed to take some special hits from the likes of Thundurus-T and Alolan-Ninetales, while being able to OHKO Thundurus-T and Latias. Icium Z Ice Punch on this set accomplishes the OHKOs. Earthquake helps stop Alolan-Marowak, and can hit the likes of Alolan-Muk and Doublade too. Brick Break is mainly for Aurora Veil. Aurora Veil offense is a very scary reality that I might have to face. It can also do okay damage to something like Mega Glalie, Alolan-Persian, and Exploud. Toxic would be a better way of dealing with the Alolan-Persian, and some other bulky threats. I was pretty reluctant about this Pokemon coming to this matchup. Nothing on his team is weak to Electric, and he has Electric sponges in both Thundurus-T and Alolan-Marowak with Lightning Rod. But I've found that bulky Electric types handle fast and powerful Electric pretty nicely. I had experience with Assault Vest Heliolisk.
Offensive Calcs:
Defensive Calcs:
Ability: Motor Drive
EVs: 16 HP / 252 Atk / 4 Def / 176 SpD / 60 Spe
Adamant Nature
- Ice Punch
- Earthquake
- Brick Break
- Toxic
This Electivire was designed to take some special hits from the likes of Thundurus-T and Alolan-Ninetales, while being able to OHKO Thundurus-T and Latias. Icium Z Ice Punch on this set accomplishes the OHKOs. Earthquake helps stop Alolan-Marowak, and can hit the likes of Alolan-Muk and Doublade too. Brick Break is mainly for Aurora Veil. Aurora Veil offense is a very scary reality that I might have to face. It can also do okay damage to something like Mega Glalie, Alolan-Persian, and Exploud. Toxic would be a better way of dealing with the Alolan-Persian, and some other bulky threats. I was pretty reluctant about this Pokemon coming to this matchup. Nothing on his team is weak to Electric, and he has Electric sponges in both Thundurus-T and Alolan-Marowak with Lightning Rod. But I've found that bulky Electric types handle fast and powerful Electric pretty nicely. I had experience with Assault Vest Heliolisk.
Offensive Calcs:
- Outspeeds his fastest Pokemon (Alola-Persian) by 1 point.
- 252+ Atk Electivire Ice Punch vs. 0 HP / 0 Def Thundurus-Therian: 232-274 (77.5 - 91.6%) -- guaranteed OHKO after Stealth Rock
- 252+ Atk Electivire Subzero Slammer (140 BP) vs. 0 HP / 0 Def Thundurus-Therian: 432-510 (144.4 - 170.5%) -- guaranteed OHKO
- 252+ Atk Electivire Subzero Slammer (140 BP) vs. 252 HP / 4 Def Latias: 350-414 (96.1 - 113.7%) -- guaranteed OHKO after Stealth Rock
- 252+ Atk Electivire Earthquake vs. 0 HP / 4 Def Marowak-Alola: 212-250 (81.2 - 95.7%) -- guaranteed OHKO after Stealth Rock
- 252+ Atk Electivire Earthquake vs. 248 HP / 0 Def Muk-Alola: 294-346 (71.1 - 83.7%) -- guaranteed 2HKO
- 252+ Atk Electivire Earthquake vs. 240 HP / 0 Def Eviolite Doublade: 110-130 (34.4 - 40.7%) -- guaranteed 3HKO
- 252+ Atk Electivire Earthquake vs. 0 HP / 4 Def Ninetales-Alola: 146-172 (50.8 - 59.9%) -- guaranteed 2HKO
- 252+ Atk Electivire Brick Break vs. 0 HP / 4 Def Ninetales-Alola: 109-129 (37.9 - 44.9%) -- guaranteed 3HKO
Defensive Calcs:
- 252 SpA Ninetales-Alola Blizzard vs. 16 HP / 176 SpD Electivire: 124-147 (42 - 49.8%) -- 30.5% chance to 2HKO after hail damage
- 252 SpA Life Orb Thundurus-Therian Focus Blast vs. 16 HP / 176 SpD Electivire: 174-205 (58.9 - 69.4%) -- guaranteed 2HKO
- 0 Atk Persian-Alola Foul Play vs. 16 HP / 4 Def Electivire: 226-267 (76.6 - 90.5%) -- guaranteed 2HKO
Trickywi (Sylveon) (F) @ Leftovers
Ability: Cute Charm
EVs: 252 HP / 252 Def / 4 SpA
Bold Nature
IVs: 0 Atk
- Moonblast
- Shadow Ball
- Wish
- Protect
Certainly an unconventional phys def Sylveon set, but hear me out. Or don't. Because the reason why I wanted to run Moonblast and Cute Charm together over Hyper Voice and Pixilate was Soundproof Exploud. It could just as easily run Scrappy to be able to hit my Dhelmise upon switch in, but it does already have access to Fire Blast for that. And having a set that can be walled so easily by one Pokemon is never a good thing. Usually just gives that Pokemon the ability to come in whenever they want and get a kill or cause some other trouble.
Moonblast was Sylveon's STAB attack of choice in this battle. His team overall doesn't really like to keep taking hits from it. Alolan-Persian, Hitmontop, and Latias definitely don't want to take it. His resists lack recovery. And I went with Shadow Ball just to put some extra pressure on resists like Alolan-Marowak and Doublade. Wish and Protect are just so good for recovering and scouting move choices from the opponent.
Offensive Calcs:
Ability: Cute Charm
EVs: 252 HP / 252 Def / 4 SpA
Bold Nature
IVs: 0 Atk
- Moonblast
- Shadow Ball
- Wish
- Protect
Certainly an unconventional phys def Sylveon set, but hear me out. Or don't. Because the reason why I wanted to run Moonblast and Cute Charm together over Hyper Voice and Pixilate was Soundproof Exploud. It could just as easily run Scrappy to be able to hit my Dhelmise upon switch in, but it does already have access to Fire Blast for that. And having a set that can be walled so easily by one Pokemon is never a good thing. Usually just gives that Pokemon the ability to come in whenever they want and get a kill or cause some other trouble.
Moonblast was Sylveon's STAB attack of choice in this battle. His team overall doesn't really like to keep taking hits from it. Alolan-Persian, Hitmontop, and Latias definitely don't want to take it. His resists lack recovery. And I went with Shadow Ball just to put some extra pressure on resists like Alolan-Marowak and Doublade. Wish and Protect are just so good for recovering and scouting move choices from the opponent.
Offensive Calcs:
- 4 SpA Sylveon Shadow Ball vs. 0 HP / 4 SpD Marowak-Alola: 150-178 (57.4 - 68.1%) -- guaranteed 2HKO
- 4 SpA Sylveon Moonblast vs. 252 HP / 252 SpD Hitmontop: 168-198 (55.2 - 65.1%) -- guaranteed 2HKO after Leftovers recovery
- 4 SpA Sylveon Shadow Ball vs. 248 HP / 8 SpD Cofagrigus: 120-142 (37.6 - 44.5%) -- guaranteed 3HKO
- 4 SpA Sylveon Moonblast vs. 252 HP / 0 SpD Persian-Alola: 318-374 (95.2 - 111.9%) -- guaranteed OHKO after Stealth Rock
- 4 SpA Sylveon Moonblast vs. 252 HP / 0 SpD Latias: 180-212 (49.4 - 58.2%) -- guaranteed 2HKO after Stealth Rock
Defensive Calcs:
- 252+ Atk Thick Club Marowak-Alola Flare Blitz vs. 252 HP / 252+ Def Sylveon: 292-345 (74.1 - 87.5%) -- guaranteed 2HKO after Leftovers recovery
- 252+ Atk Muk-Alola Poison Jab vs. 252 HP / 252+ Def Sylveon: 234-276 (59.3 - 70%) -- guaranteed 2HKO after Leftovers recovery
- +2 252+ SpA Cofagrigus Never-Ending Nightmare (160 BP) vs. 252 HP / 0 SpD Sylveon: 367-433 (93.1 - 109.8%) -- 56.3% chance to OHKO after Leftovers recovery
SubtoReedIRL (Zoroark) @ Assault Vest
Ability: Illusion
EVs: 32 HP / 252 SpA / 224 Spe
Timid Nature
- Dark Pulse
- Extrasensory
- Focus Blast
- Knock Off
Here he is! The sneaky boy. Sabastian's team is stacked with Ghost and Dark types, so I knew I wanted something that could take a hit from both. Zoroark isn't the bulkiest Pokemon, but can certainly deal with the Ghosts. Dark Pulse makes short work of Doublade, Cofagrigus, and Alolan-Marowak. Focus Blast hits Alolan-Persian on it's special side, bypassing that annoying Fur Coat ability, and Mega Glalie. It was also by best option for Alolan-Muk and Alolan-Ninetales. Extrasensory hits the Hitmontop. And Knock Off removes items that I mentioned earlier. I really didn't want to deal with items that I could just get rid of. This set was designed to support my Salazzle. I decided to disguise Zoroark as Sylveon during the battle to bait Alolan-Marowak or Doublade to stay in on it, and it would mean that Hitmontop probably wouldn't try and mess with it and switch out fearing the Fairy type move. Or Hitmontop might go for Toxic and take an Extrasensory. Assault Vest would help against Pokemon like HP Fighting Cofagrigus and Choice Scarf Latias, and perhaps the biggest threat to my team; the Thundurus-T.
Offensive Calcs:
Ability: Illusion
EVs: 32 HP / 252 SpA / 224 Spe
Timid Nature
- Dark Pulse
- Extrasensory
- Focus Blast
- Knock Off
Here he is! The sneaky boy. Sabastian's team is stacked with Ghost and Dark types, so I knew I wanted something that could take a hit from both. Zoroark isn't the bulkiest Pokemon, but can certainly deal with the Ghosts. Dark Pulse makes short work of Doublade, Cofagrigus, and Alolan-Marowak. Focus Blast hits Alolan-Persian on it's special side, bypassing that annoying Fur Coat ability, and Mega Glalie. It was also by best option for Alolan-Muk and Alolan-Ninetales. Extrasensory hits the Hitmontop. And Knock Off removes items that I mentioned earlier. I really didn't want to deal with items that I could just get rid of. This set was designed to support my Salazzle. I decided to disguise Zoroark as Sylveon during the battle to bait Alolan-Marowak or Doublade to stay in on it, and it would mean that Hitmontop probably wouldn't try and mess with it and switch out fearing the Fairy type move. Or Hitmontop might go for Toxic and take an Extrasensory. Assault Vest would help against Pokemon like HP Fighting Cofagrigus and Choice Scarf Latias, and perhaps the biggest threat to my team; the Thundurus-T.
Offensive Calcs:
- Outspeeds Timid max speed Thundurus-T by 1 point.
- 252 SpA Zoroark Dark Pulse vs. 0 HP / 4 SpD Marowak-Alola: 296-350 (113.4 - 134%) -- guaranteed OHKO
- 252 SpA Zoroark Dark Pulse vs. 240 HP / 16 SpD Eviolite Doublade: 284-336 (89 - 105.3%) -- 31.3% chance to OHKO | Need a bit of chip to seal the deal. Stealth Rock isn't enough because of it's resistance.
- 252 SpA Zoroark Dark Pulse vs. 248 HP / 8 SpD Cofagrigus: 236-278 (73.9 - 87.1%) -- guaranteed 2HKO
- 252 SpA Zoroark Dark Pulse vs. 4 HP / 0 SpD Latias: 198-234 (65.5 - 77.4%) -- guaranteed 2HKO
- 252 SpA Zoroark Dark Pulse vs. 0 HP / 4 SpD Thundurus-Therian: 148-175 (49.4 - 58.5%) -- guaranteed 2HKO after Stealth Rock
Defensive Calcs:
- 252+ SpA Cofagrigus Hidden Power Fighting vs. 0 HP / 32 SpD Assault Vest Zoroark: 112-132 (42.9 - 50.5%) -- 1.2% chance to 2HKO
- 252 SpA Latias Draco Meteor vs. 0 HP / 32 SpD Assault Vest Zoroark: 181-214 (69.3 - 81.9%) -- guaranteed 2HKO
- 252 SpA Life Orb Thundurus-Therian Thunderbolt vs. 0 HP / 32 SpD Assault Vest Zoroark: 199-235 (76.2 - 90%) -- guaranteed 2HKO
The Aftermath
Here is the battle link: https://replay.pokemonshowdown.com/battlearea-gen7draftleague-30676
Week 4: Toronto Maple Leafeons (AbruptFury) vs. San Jose Sharpedos (Luxcrio)
Team that Sabastian brought: Mega Glalie, Thundurus-T, Alolan-Ninetales, Alolan-Muk, Alolan-Persian, Alolan-Marowak
--------------------------------------------------------------------------------------------------------------------------
Team that Sabastian brought: Mega Glalie, Thundurus-T, Alolan-Ninetales, Alolan-Muk, Alolan-Persian, Alolan-Marowak
--------------------------------------------------------------------------------------------------------------------------
Match Summary and Explanations
- I knew that Aurora Veil from Alolan-Ninetales was something that I wanted to stop, so I led my Brick Break Electivire against his Alolan-Ninetales.
- He decides to just go for the Aurora Veil right off the gate, as I destroy it with the Brick Break.
- I went for another Brick Break trying to make sure the Aurora Veil was not up, but he just switches into Alolan-Marowak for free. This is not a good position. Perhaps I should've just went for the Earthquake since Brick Break was not a 2HKO on Alolan-Ninetales, but would've been with the added Earthquake damage. But then he could've gotten the switch after he got the Aurora Veil up, but blocked my only way of destroying it all together. So the former was probably the better play, even if it meant having to deal with a full health Alolan-Marowak.
- I decided to switch into Donphan, knowing well that I could take anything Alolan-Marowak wanted to go for. He does a huge chunk with the Flare Blitz. He shows to be Lightning Rod or Cursed Body Alolan-Marowak, rather than Rock Head with the recoil damage.
- I reveal the Knock Off and Cursed Body activates. The Thick Club is gone and this Marowak just got a lot weaker in damage output. Expecting my switch into Sylveon perhaps, he decides to use Iron Head over Flare Blitz. Donphan is spared from the KO.
- Sabastian makes the play of Detect against my Donphan. This might have been to get the down on it so that he could switch into something to counter whatever I brought out in place of Donphan, but knowing that I made my Donphan faster than his Alolan-Marowak, I just set up my Stealth Rock and go down to the hail. Alolan-Marowak drops too. This would be more of a suicide than a kill since it was Alolan-Ninetales' hail that finished off Donphan, so no kill for Dumbo :( I send in my Salazzle since it loves the matchup against everything, and Sabastian sends in Mega Glalie.
- I know very well that I can just outspeed this thing and don't want to take an Earthquake while setting up, so I just throw off the Fire Blast. Sabastian anticipates this and switches into his bulky Alolan Muk. The attack knocks it below 50% and it is able to consume it's Iapapa Berry, bringing back to a healthy percentage.
- I know that Salazzle doesn't take hits very well from Alolan-Muk, so I switched into my Zoroark to take a possible Knock Off or Poison Jab. He uses Rock Slide and unveils my Illusion.
- I make a misplay here and go for Knock Off. I was trying to remove a possible Assault Vest (because that was a high priority item in my plan), but I forgot about the berry earlier. And my mistake cost me my Zoroark. It went down to a Brick Break. I bring in my Kyurem-Black to pressure him.
- Since it is very well known that Kyurem-Black packs Earth Power in it's movepool, I thought it might be enough to force a switch, so I try and set up a Substitute. Sabastian, however, was not deterred and just goes for Rock Slide.
- This time, I just go for the Earth Power and miss out on the KO. Alolan-Muk uses Rock Slide again and does some decent damage.
- Sabastian tries to pull a switch into Thundurus-T on my Earth Power, but I actually decided to go for Ice Beam that turn in case he wanted to try that. Down goes Thundurus-T and Kyurem-Black gets it's first kill of the season! In comes the Alolan-Persian.
- I know that Alolan-Persian can't really damage Sylveon very well, so that's what I decided to switch into. Persian does very little damage with a Power Gem against my Sylveon.
- Sabastian decides to switch out into Alolan-Ninetales as I go for Wish with Sylveon to keep it healthy.
- I know he wants to set up another Aurora Veil, being faster and all against Sylveon, so I hard switch back into Electivire. He does, in fact, set up the Veil again.
- Alolan-Ninetales throws off a Blizzard in the hail as a last ditch effort to stop my Electivire, but to no a-Veil. With the added Stealth Rock damage earlier, it goes down to the Brick Break and Aurora Veil is gone for good. That's a kill for Electivire. In comes Mega Glalie.
- I knew I didn't have much against the coverage of Ice and Ground, so I decided to just stay in and go for Brick Break. Apparently, he did not EV his Mega Glalie to be faster than Adamant 60 EV Electivire, because that thing just goes down to my Brick Break. I'm really not sure why that was the case. But anyway, Electivire has 2 kills. He's putting in a lot of work for me this season with 6 kills overall.
- Alolan-Muk takes the field again, but falls to the Stealth Rock. That means that even in death, Donphan was still able to get a kill! That's Donphan's first kill of the season! Last Pokemon Alolan-Persian returns to battle.
- Wanting to keep my differential intact, and that Foul Play would easily to be the end of my Adamant max attack Electivire, I decided to save him by having Sylveon finish off the Persian. And the game is wrapped up 4-0 for us as our new record becomes 3-1 this season! Go, Toronto Maple Leafeons!
In Conclusion
Good game to Sabastian! I know it's been a rough start, but I hope you can stage some sort of comeback. You made a couple of transactions, and one of them was what I was thinking your team could use. A bulky Water type. Since your team was already so well off against Electric. It would add some nice defensive backbone. Thank you for being able to work with my schedule since it was very hard to have the battle during free time for me, since I didn't really have much.
Thank you for reading my article! I hope it has been entertaining and insightful. Next week, I face Ryo of the Pittsburgh Huge Powers. I could definitely use some Huge Power against him. His team is basically the definition of T H I C C. Until then, have yourself a good day. I am signing off!
Subscribe to:
Posts (Atom)